The 2018 Lancaster NY Hamfest is over. It might be the last one for me this year unless I go to the one in Elmira NY.
This is my display. I had already sold some stuff!
This was a really neat home made 811 tube RF amplifier.
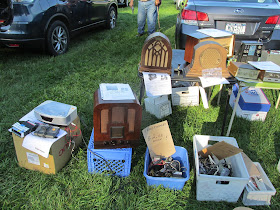
This vendor had lots of antique radio's.
More of the same vendor stuff.
How is this for a beautiful radio? Its a "Scott Tuner" but not HH Scott!
Here is a couple of beautiful Heathkit radio's.
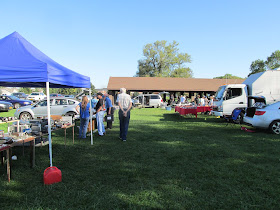
This is what the hamfest looked like from half way down one isle.
.
Monday, September 17, 2018
Monday, September 10, 2018
Home Repairs/Upgrades
I recently replaced the lattice in my carport with the heavy plastic. The panels are called "26 in. x 8 ft. Polycarbonate Roofing Panel in Clear" I did it because one of my neighbors threw out the panels. Then I replaced the slats that were on my deck with the lattice.
This picture is what the carport looked like half done.
This is what the carport looked like when it was almost done.
This is the old deck rail slats being removed. I had already started replacing the slats with lattice when I took the picture.
This picture is what the carport looked like half done.
This is what the carport looked like when it was almost done.
This is the old deck rail slats being removed. I had already started replacing the slats with lattice when I took the picture.
This is the new deck rail with lattice installed and painted.
Sunday, September 9, 2018
Chevy HHR Exhaust coupling repair
My HHR started sounding more like a tractor. I could not see the problem but I could feel the heat coming from this joint. As you can see it was rusted out.
I purchased two 2 inch pipe clamps at the local car parts store. They are Ni Exhaust Solutions "Split Flange". Each one comes with two bolts. They have to be pried apart and worked back and forth until they open and close. Then, open one side of both clamps and put a bolt through the closed sides. Then rotate them into place so the first bolt is above the fitting. Then close the flanges and install the lower bolt. It took me over an hour to close the lower flanges. If you can get them close to closed you can get a flat blade screwdriver in there and close them the rest of the way. Then install the lower bolt. That took a long time as well. One of the issues is the metal gasket gets in the way. I think I managed to damage the gasket as once it was together it still leaked. But at least the pipes were not going to fall off the car!
Here is the clamp once installed. It was hard to tighten the upper bolt as the socket set would not click in the short space.
That solved the problem for now. I know that eventually I will need a new exhaust but for now the leak is fixed.
I purchased two 2 inch pipe clamps at the local car parts store. They are Ni Exhaust Solutions "Split Flange". Each one comes with two bolts. They have to be pried apart and worked back and forth until they open and close. Then, open one side of both clamps and put a bolt through the closed sides. Then rotate them into place so the first bolt is above the fitting. Then close the flanges and install the lower bolt. It took me over an hour to close the lower flanges. If you can get them close to closed you can get a flat blade screwdriver in there and close them the rest of the way. Then install the lower bolt. That took a long time as well. One of the issues is the metal gasket gets in the way. I think I managed to damage the gasket as once it was together it still leaked. But at least the pipes were not going to fall off the car!
Here is the clamp once installed. It was hard to tighten the upper bolt as the socket set would not click in the short space.
 |
| Split Flange Clamps |
It still leaked so I covered the whole thing with J-B Weld "Muffler Weld" Cement.
 |
| J-B Weld Muffler Cement |


