Back before the last presidential election I had a dream about the second civil war. It was so strong and shocking that I goggled it to find out that someone was saying that if Obama did not win the election there would be a 'second civil war'. Since then I have had many more similar dreams. What bothers me most is that when I watch what is happening in Libya and Egypt, I see that same thing happening here in the USA!
Recently I came across an article full of sarcasm, I think, on the subject of the impending second civil war. It was called 'Tax the Super Rich now or face a revolution'. That connected several dots. I have talked on how the government is taxing the poor and giving the money to the rich (bailouts). In fact the government is taxing our kids and our grandchildren to feed the rich. They want to tax the skinny and give that to the fat (Supposed 'fat' tax that only taxes skinny people who refuse to eat 'diet' food). What will they tax next? My favorite old question is what will they do when the taxes reach 100%?
Another problem is the squeezing of the middle class and the new graduates. Taxes have gone up, employees are passing the cost of health insurance on to their employees. Real take home incme has gone down dramatically! My 'take home' pay is the lowest it has been in 20 years! At the same time the cost of everything is going up. Gas for the car has tripled. New car prices have tripled. Food prices are up, rent has doubled and a new home is out of this world. The net result is that no one can afford any 'luxuries' like cable TV, internet, a newer car, etc. So sales have fallen and the end result is a 'recession' that seems to last forever.
You ask me what I think about the TEA party? Well they say 'Taxed Enough Already'. I say we are grossly overtaxed. That is why all of these countries are rebelling. The US needs to immediately drop all taxes (and taxes that are not called taxes) on people making less than $50,000 a year. According to the IRS they account for less than 5% of all taxes, so why not!? The last Tea party was over a 3% tax. You say the problem was just taxation without representation? So if they were allowed to send a representative to England then they would have been glad to pay a 50% tax? What kind of a idiot do you take me to be?
Wednesday, March 30, 2011
Wednesday, March 16, 2011
Cleaning up after the Palladium Virus & Cohorts
A computer recently was infected by the Palladium virus twice. The first time Malware bytes anti-malware and Windows Defender claimed to have it fixed. However after checking the log files I looked in C:\documents and settings\networkservice\application data I discovered that there were a lot of left over files that had the infection. It creates random files of its infection so it can reinfect the computer. You need to manually remove these files.
First look for the batch files, they are a 3 or 4 digit number followed by '.bat'. I renamed one as '.txt' so I could safely look at it and sure enough it re installs the virus. Next get the JavaScript files they are random letters followed by '.js'. Again they reinstall the virus. Then there was a '.dat' file also bearing the same creation date. I do not know if it needs to be deleted or not. Also delete any random letters followed by '.exe' files. The anti-virus program should have removed them but there may be some left behind. The big giveaway is the random letters and the creation date all being the date of the computers infection.
In the picture I put a box around the files left over after the infection.

Wednesday, March 9, 2011
Electromagnetic Coil Devices
Electromagnetic Coil Devices. We make two models of Pulsed Electromagnetic Coil Devices.
Super Thumper - Sold Out. This device produces a 300 volt pulse of up to 100 Amps into a 3 inch coil of around 50 feet of Enameled 14 gauge wire. It has a power transformer and a voltage multiplier to produce the 300 volts. It takes about 5 seconds to charge the capacitor bank to 300 volts. The capacitor bank is 8 x 390 uF at 400 volts.

Low Power Doug Coil - Sold out. This is modeled after the Doug Coil setup but it is a lower power version. Basically a frequency generator feeds a Power amplifier that feeds a Capacitor bank that feeds a Coil. The frequency generator can be a professional device or a computer program can makes any computer into a frequency generator. The Power amplifier needs to deliver 100 volts peak to peak or be able to handle about 250 watts and it needs to be able to drive a 2 ohm load. This is very demanding and usually a QSC amplifier is used. The capacitor bank consists of a box having 6 switches and combinations of 400 volt capacitors to give .5, 1, 2, 4, 8, and 16 uF. The coil is made from around 500 feet of 14 or 12-gauge wire. It can be enameled or insulated wire. The picture shows a switch box, a 14 gauge enameled coil as well as a 12 gauge insulated coil. Amplifier and signal generator not included.

Friday, March 4, 2011
Totally Free Keyword Analyzer Tool (KAT)
My "Keyword Analyzer Tool" or KAT has a new home. Its now on a new web site. Who knows maybe soon I bill buy my own site? Anyway here it is: http://www.davismission.org/keyword/
You can enter the name of any web site and get instant results as to what keywords are found on that site. I made it capable of logging 2 letter words that other keyword analyzers throw out because some sites have critical 2 letter words.
It has 4 columns. One for the entire page, one for words in links one for words in Headings, and the last one is for words that are bold or strong.
Keyword Analyzer Tool

Monday, February 28, 2011
Quiz Practice and Quiz Master Machine or Buzzer Lockout
Davis Computers and Electronics Proudly Presents Our Products
Everything is Hand Made right here in the USA
Quiz Machines. We make two models of quiz machines. My unique design only has one IC the LED's form an 8 input OR gate to trigger the latch. Other designs can be made by request, such as models with the lights in the hand units.
Quiz Practice Machine - $250. Designed for practicing in the car, on the go, or wherever. It features 6 players, 3 foot wires to the hand units and battery operation.


Friday, February 25, 2011
Google Fixes Search - They Removed Content Farms
A while back I talked about link farms or content farms, in fact I even created my own definitions. It was listed under SEO and titled 'how to get rich on the internet part 2"
Now the news is out that Google has fixed its search algorithm problems.When I read that I immediately went out and checked out some common search terms. I tried some phrases that previously found 3 or more pages of junk before you actually found any 'meat'. To my amazement they were all spam free! Go Google!
On the sad front today I got 'Binged'. That terrible virus from the ivory palaces of Microsoft got onto my computer. Every time I try to Open Firefox it brings up that virus. Do they feature an uninstall for it?
 I went into 'tools' options' 'manage add ons' and uninstalled the virus from Microsoft. Someone has to put a stop to this. They are trying to take over the world by the most corrupt and immoral methods known by mankind!
Now the news is out that Google has fixed its search algorithm problems.When I read that I immediately went out and checked out some common search terms. I tried some phrases that previously found 3 or more pages of junk before you actually found any 'meat'. To my amazement they were all spam free! Go Google!
On the sad front today I got 'Binged'. That terrible virus from the ivory palaces of Microsoft got onto my computer. Every time I try to Open Firefox it brings up that virus. Do they feature an uninstall for it?

Wednesday, February 16, 2011
Dunlap Clarke Amplifier Rebuild
I am once again rebuilding this Dunlap Clark amplifier. I rebuilt it around 1990 to a four channel 200 watt per channel amplifier after teh first system fried. Then a few year I got it back with two channels fried and I just fried the last channel in my latest youtube video 'comparing coils'.
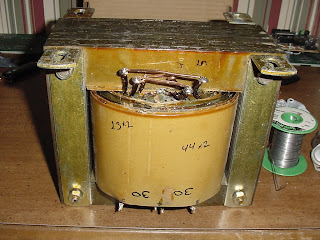
 The first repair was to modify the power transformer to reduce it to 60 volts center taped from 100 volts center taped. This involved pulling out some windings and adding some jumpers around some of the windings.
 This is a picture of the heat sinks witht eh TO-3 output transistors. I will likely use TDA7294 IC's to rebuild it so the old transistors have to go!
 Out of all the transistors there were only 11 that were not totally fried. One even had the emitter lead burnt off the transistor!
 The TDA7294 circuit board finally arrived. It comes in several configurations. Four 75 watt amplifiers, two 150 watt amplifiers, one 300 watt amplifier and a combination of one 150 watt and two 75 watt amplifiers. they sell for around $30 on Ebay. Now the problem is mounting it in the heat-sink, it will require putting in smaller capacitors and drilling holes to align with the TDA7294's.

YouTube video of amplifier accidentally being fried.


YouTube video of amplifier accidentally being fried.
Friday, February 11, 2011
Dell Latitude D610 repair
I bought a used Dell D610 laptop a year ago and really like it. Since then I have purchased over 6 of them. Recently one of them started overheating and shutting down. Normally these laptops are a lot of work to get apart, but I figured out a quick 5 minute repair for this problem.
First remove the top cover plate by prying up on the right side and rocking it back and forth to disconnect it.

Next remove the 2 screws that hold down the keyboard. To remove the keyboard unhook the catch that is on each side of it then unplug it from the motherboard. The second screw is above the F4 key.

Next locate the screws that hold down the processor heat sink and loosen them. They stay attached to the heat sink.

When you remove the heat sink you should be able to see if it is clogged with dust like this one. Remove the dust and then put everything back together.

Be sure to check to see if the cooling fan runs on start up. It usually shuts off until it gets hot then it turns back on again automatically.
Thursday, February 10, 2011
Silent radio Sign Part 2
The Silent Radio LED sign is proceeding along nicely so far. I have decided on using an Arduino for the processor to run it.
 I have tested the power supply and column driver transistors, the are all working so far.
 The biggest problem so far is that the driver transistors run really hot. That is because they are half way on with 5 volts on their base and 9 volts on their collector they have to drop the difference of 4 volts at many Ma thus producing a lot of heat. A different driver circuit would cure that by turning the drivers all the way on but that would feed 9 volts to the LED array and that might be a bit too much.
Here is an updated schematic.

The next step is to get the Arduino serial and clock to connect to the signs serial and clock to send actual data to the sign.


Here is an updated schematic.

The next step is to get the Arduino serial and clock to connect to the signs serial and clock to send actual data to the sign.
Wednesday, February 9, 2011
Palladium Fake anti-virus
I just had the 'palladium fake anti-virus' attack a computer. To fix it I first restarted in safe mode and then installed Malware Bytes AntiMalware (MBAM) ran a full system scan and it removed all but 7 files. They were all located at "C:\Documents and Settings\NetworkService\Application Data" and all of them had today's date as their creation date. I manually deleted them, emptied the recycle bin and restarted the computer. I also ran CCleaner and it deleted all of the temporary files.
I also had to reinstall MS Office as MS Outlook was trashed and would not run even in safe mode.
MBAM Log file:
Malwarebytes' Anti-Malware 1.50.1.1100
www.malwarebytes.org
Database version: 5721
Windows 5.1.2600 Service Pack 3
Internet Explorer 7.0.5730.13
2/9/2011 12:59:34 PM
mbam-log-2011-02-09 (12-59-34).txt
Scan type: Full scan (C:\|D:\|)
Objects scanned: 221304
Time elapsed: 28 minute(s), 0 second(s)
Memory Processes Infected: 0
Memory Modules Infected: 0
Registry Keys Infected: 0
Registry Values Infected: 1
Registry Data Items Infected: 0
Folders Infected: 0
Files Infected: 6
Memory Processes Infected:
(No malicious items detected)
Memory Modules Infected:
(No malicious items detected)
Registry Keys Infected:
(No malicious items detected)
Registry Values Infected:
HKEY_CURRENT_USER\Software\Microsoft\Windows NT\CurrentVersion\Winlogon\Shell (Rogue.Palladium) ->
Value: Shell -> Quarantined and deleted successfully.
Registry Data Items Infected:
(No malicious items detected)
Folders Infected:
(No malicious items detected)
Files Infected:
c:\documents and settings\networkservice\application data\guwr76D.exe (Trojan.Downloader) ->
Quarantined and deleted successfully.
c:\documents and settings\networkservice\application data\r9zgp6ak4.exe (Trojan.Downloader) ->
Quarantined and deleted successfully.
c:\documents and settings\networkservice\local settings\temporary internet files\Content.IE5\683C8M6Q\cbta[1].exe (Trojan.Downloader) ->
Quarantined and deleted successfully.
c:\documents and settings\Sue\application data\palladium.exe (Rogue.Palladium) ->
Quarantined and deleted successfully.
c:\documents and settings\Sue\local settings\Temp\_check32.bat (Malware.Trace) ->
Quarantined and deleted successfully.
c:\WINDOWS\ws386.ini (Malware.Trace) ->
Quarantined and deleted successfully.
Monday, February 7, 2011
Super thumper my latest revisions.
My super thumper has been redesigned once again. The 24 volt AC adapter took 15 seconds to charge the capacitors so I went back to using a power transformer and reduced the charging time to 5 seconds. Note the use of a plastic lid to cover the coil.

Fitting the power transformer in the smaller cabinet was tricky but here it is all fit nicely in the instrument case.

Its up for sale for $250 and I might list one on Ebay to help sell them.

Fitting the power transformer in the smaller cabinet was tricky but here it is all fit nicely in the instrument case.

Its up for sale for $250 and I might list one on Ebay to help sell them.
Thursday, February 3, 2011
Wordpress page title tag modification for dynamic titles
This code will get the web page title and description to automatically change from a page to a category to a post. That way the blue status bar at the top of your browser will more accurately reflect what you are seeing. Also If you roll over the browsers tab the box that appears will reflect what page you are on.
Basically what is says is is this a single post? If so, show the post title. Is it a category? If so, show the category name. Otherwise show the blog description.
Basically what is says is is this a single post? If so, show the post title. Is it a category? If so, show the category name. Otherwise show the blog description.
< title >
< ?php if ( is_single() )
{ bloginfo('name'); echo " - ";
single_post_title('', true); }
elseif ( is_category() ) { bloginfo('name');
echo " - "; $category = get_the_category();
echo $category[0]->cat_name; }
else { bloginfo('name'); echo " - ";
bloginfo('description'); }
? > < /title >

< meta name="description" content="
< ?php if ( is_single() ) {
bloginfo('name'); echo " - ";
single_post_title('', true); }
elseif ( is_category() ) {
bloginfo('name'); echo " - ";
$category = get_the_category();
echo $category[0]->cat_name; }
else { bloginfo('name'); echo " - ";
bloginfo('description'); }
? > / >
Friday, January 28, 2011
Pro-Lite PL-M2014R Multi Color LED sign
I recently purchased two Pro-Lite LED signs on Ebay. They were easy to fix, I just needed to replace the capacitors in the power supply. The old ones were 4700 at 16 volts, all I had was 2200 at 25 volts so I used them and they worked fine. They are the blue caps on the left in this picture.
 Here is a picture of both of the signs working.
 Now to make a 9 pin to telephone jack cable so I can program them from a computer.


Getting the Pro-Lite signs to work.
The instructions say to make a 4 conductor telephone cable to a 9 pin female serial connector. Red and Green go to pin 2 and 3 then the yellow wire goes to pin 5. Well I tried 300 baud, 9600 baud, a sign ID number of 1 to 10 and nothing worked. I reversed pins 2 and 3 to no avail. I got out my voltmeter and checked pins 2 and 3 and they were right to begin with. When they are wired correctly they should both meter about negative 2 to negative 5 volts. I also found out that both the yellow and the black wire are ground and can connect to pin 5 of the 9 pin serial connector.
There were two solutions to my dilemma. In spite of what the notes say both signs were configured to 2400 baud. I figured that out by trial and error. You are supposed to get a remote control and use that to find out what the baud rate and the sign ID is currently set to. However if you select a sign ID of ‘0’ it sends your message to ‘all’ or in this case ‘any’ sign that you have connected. Telling it to display the time is an easy way to test the communications setup. Once that is set you can move on to more advanced programming.
Wednesday, January 26, 2011
Silent Radio LED Sign
I have obtained two Silent Radio LED signs on Ebay and I intend on rebuilding them. To get one of them apart I had to reach through a hole in the back and cut the wires to the power transformer. To remove the logic board I had to use pliers on the screw head and pliers on the mounting shaft. In one case the screw broke off rather than come out. Tin sheers or heavy duty wire cutters can be used to remove the connectors between the sign and the logic board.

Once the board is removed the reverse engineering can begin. The pin-out is quite simple;
1. 5 Volts
2. Ground
3. Seven common Anode lines (5 volts to light up)
4. Seven common Anode lines (5 volts to light up)
5. Seven common Anode lines (5 volts to light up)
6. Seven common Anode lines (5 volts to light up)
7. Seven common Anode lines (5 volts to light up)
8. Seven common Anode lines (5 volts to light up)
9. Seven common Anode lines (5 volts to light up)
10. Ground
11. Data
12. Clock
These same 12 lines are available at both ends of the sign. I broke a couple of runs when removing the logic board. Maybe un-soldering it would have been a better idea?

My objective is to make a very simple straingtforward interface to run the sign from a PC. Perhaps use the PC's serial port directly, a 8051, a Basic Stamp or some other simple common controller.
Here is some of my old work on LED array signs;
http://sites.google.com/site/bobdavis321/led-array-projects
I have several posts on LED sign modifications.
Check this one out for more on the Silent Radio Modifications:
https://bobdavis321.blogspot.com/2013/05/silent-radio-led-sign-to-arduino.html
Here is part three on Silent Radio signs:
https://bobdavis321.blogspot.com/2011/05/silent-radio-led-sign-part-3.html
And here is part four:
https://bobdavis321.blogspot.com/2011/05/silent-radio-led-sign-part-3_16.html
Here is a simple column driver adapted from one of my old schematics. The problem with this setup is that you cannot turn off the columns while updating the shift registers. Perhaps another IC would work better?

This is the error message it displayed on arrival:

Wednesday, January 19, 2011
Look@lan - a good network tool
Today while looking at the logs I saw that a computer was misbehaving however I could not identify the computer name. I tried Nmap/Zenmap several times and several settings to no avail. Then I tired look@lan and instantly got the answer!

After looking around a while I discovered another feature. If you click on an IP address it gives lots more details about that computer including all the open ports!


After looking around a while I discovered another feature. If you click on an IP address it gives lots more details about that computer including all the open ports!

Tuesday, January 18, 2011
IPCop bit the dust again back to Netgear FVX538
Our IPCop server quit working again. Network traffic slowed to a crawl so I called Time Warner and we determined that the problem was here. I switched in the Netgear firewall instead of the IPCop computer and the network came back up to speed.
When looking at the Netgear firewall logs I saw that flood control was being activated by a computer about every 4 minutes. So the problem may have just been that computer. MBAM found and removed a virus.
The big complaint about Netgear is that the default configuration allows everything. So you have to configure it to block everything then enable what protocols that you want to allow. When you get done it should look something like this:

The 'any' 'block always' and 'log always' at the bottom is so that any attempted violation of the rules will be logged. This is a big help for troubleshooting when something is blocked from working just check the log then add it to the list of allowed protocols.
Monday, January 17, 2011
Stuff to sell
I am selling a lot of my stuff on Ebay. Look on Ebay under bob_davis321 to find my stuff that is for sale. My email address is bobdavis321(at)gmail.com Make sure yo replace the (at) with @ so it will work.
Besides the stuff on Ebay I am also selling these three things;
1. Sold - My 'Super Thumper', washer launcher or 'Electromagnetic pulse device' based on the Bob Beck design.
2. Sold - My Improved 'Doug Coil' device with the capacitor switch box (QSC Amplifier is NOT included)
3. Sold - My 24 KV Power supply that is used for a Rife Tube driver (Rife tube is NOT included).
All of my devices are improved, cheaper, and simpler than the original designs. For example the Super Thumper runs off an ac adapter making it much safer electrically. The 'Doug Coil' uses 14 Gauge enameled wire making it much more powerful than when you are using one that is made with insulated wire.
Here are pictures of version 3 of the Super Thumper that is up for sale for $250, first a picture of the insides.
 Then what it looks like on the outside, note the 24 VAC adapter on the left to power it..
 I am looking for a cover for the coil to make it look nicer. A mayonnaise jar lid might work nicely. Here is an updated schematic. The input is 24 to 30 VAC at 1 amp. Sorry that the schematic is so small, you can click on it and then it will get bigger.
 Super Thumper Specifications;
Capacitor bank: 8 x 390uF at 400 volts
Power source: 24-30 VAC at 1 amp
Voltage Multiplier: 4 x 4A bride rectifiers and 7 x 220uF Capacitors.
SCR: Minimum 100 Amps at 400 Volts
Coil: approx 50 feet 14 Gauge enameled wire 3" in diameter.
Coil plug: 4 pin Cinch-Jones connector
Wire to Coil: approx 5 feet of 16 gauge stranded wire
Box size: approx. 8 inches by 6 inches by 2.5 inches
The Doug Coil Setup, the Capacitor is in a switch box to select the correct value. I will include the coil and switch-box. You can use a frequency generator program on a computer and the QSC amplifier can be purchased on Ebay. I hope to have pictures soon. It works with as little as a 100 watt amplifier but a 250 watt model is highly recommended. The QSC amplifiers can run into a 2 ohm load so they hold up better when running a coil that is only 1 ohm!

Here is a picture showing a 'normal' green Doug coil (I have 2 of them), my smaller coil (14 gauge enameled wire 9 inches in diameter) that is many times more powerful even with a smaller amplifier) and my switch box. The switch box I am selling is smaller (around 8 inches by 6 inches) and only has 6 switches on it. Normal Doug Coils are made with 12 gauge insulated wire and they are very hard on your amplifier.
My modified Doug coil specifications;
Coil: approx 500 feet 14 gauge wire (enameled or insulated)
Wire to coil: approx 5 feet of 16 gauge stranded to 1/4 inch plug
Switch box: approx 8 inches by 6 inches by 2.5 inches
Switch box jacks: 1/4 inches input and output
Capacitors: Non polarized 1/2/4/8/16 uF at 400 VAC
Switches: 15 amp SPST switches
Capacitor values for several frequencies;
300 32
400 18
500 11.5
600 8
700 6
800 4.5
900 3.5
1000 3
1100 2.5
1200 2
1400 1.5
2000 1
Last of all is my 24KV Power supply. Here it is shown running a Rife tube.
 Here is a picture of the guts. The unit for sale is about 1/3 this size. As you can see there is a lot of extra space inside.

Besides the stuff on Ebay I am also selling these three things;
1. Sold - My 'Super Thumper', washer launcher or 'Electromagnetic pulse device' based on the Bob Beck design.
2. Sold - My Improved 'Doug Coil' device with the capacitor switch box (QSC Amplifier is NOT included)
3. Sold - My 24 KV Power supply that is used for a Rife Tube driver (Rife tube is NOT included).
All of my devices are improved, cheaper, and simpler than the original designs. For example the Super Thumper runs off an ac adapter making it much safer electrically. The 'Doug Coil' uses 14 Gauge enameled wire making it much more powerful than when you are using one that is made with insulated wire.
Here are pictures of version 3 of the Super Thumper that is up for sale for $250, first a picture of the insides.


Capacitor bank: 8 x 390uF at 400 volts
Power source: 24-30 VAC at 1 amp
Voltage Multiplier: 4 x 4A bride rectifiers and 7 x 220uF Capacitors.
SCR: Minimum 100 Amps at 400 Volts
Coil: approx 50 feet 14 Gauge enameled wire 3" in diameter.
Coil plug: 4 pin Cinch-Jones connector
Wire to Coil: approx 5 feet of 16 gauge stranded wire
Box size: approx. 8 inches by 6 inches by 2.5 inches
The Doug Coil Setup, the Capacitor is in a switch box to select the correct value. I will include the coil and switch-box. You can use a frequency generator program on a computer and the QSC amplifier can be purchased on Ebay. I hope to have pictures soon. It works with as little as a 100 watt amplifier but a 250 watt model is highly recommended. The QSC amplifiers can run into a 2 ohm load so they hold up better when running a coil that is only 1 ohm!

Here is a picture showing a 'normal' green Doug coil (I have 2 of them), my smaller coil (14 gauge enameled wire 9 inches in diameter) that is many times more powerful even with a smaller amplifier) and my switch box. The switch box I am selling is smaller (around 8 inches by 6 inches) and only has 6 switches on it. Normal Doug Coils are made with 12 gauge insulated wire and they are very hard on your amplifier.

My modified Doug coil specifications;
Coil: approx 500 feet 14 gauge wire (enameled or insulated)
Wire to coil: approx 5 feet of 16 gauge stranded to 1/4 inch plug
Switch box: approx 8 inches by 6 inches by 2.5 inches
Switch box jacks: 1/4 inches input and output
Capacitors: Non polarized 1/2/4/8/16 uF at 400 VAC
Switches: 15 amp SPST switches
Capacitor values for several frequencies;
300 32
400 18
500 11.5
600 8
700 6
800 4.5
900 3.5
1000 3
1100 2.5
1200 2
1400 1.5
2000 1
Last of all is my 24KV Power supply. Here it is shown running a Rife tube.


Thursday, January 13, 2011
How to get rich on the Internet - Part 2 -Link Farms
Or should I title this 'How a bunch of scum bags are destroying the Internet'.
First of all lets get our 'terminology' correct.
Link Farms - Worthless web sites that are just links to real web sites.
Dead end Link Farms - their links go no where. The oldest I remember is motherboards.??? They just had a list of motherboard models down the middle of the page and lots of adds on both sides of the page. The adds were for adult dating sites or worse. The idea is that you are looking for help with your motherboard and you end up there where they will sell you help with your sex life. Of course the advertisers were paying for referrals to their web sites.
Circulatory Link Farms - Their links go in circles. Like if you misspell Staples you will find one, then you will go in circles that go nowhere.
Live Link Farms - These somehow follow sites like Ebay and create pages of links to live Ebay stuff. How it works is that you are on Ebay and see something that you might like. So you then Google the device name to get more information. However the first ten pages of links all go to sites that in turn link back to the the Ebay ad that you started with!
Real Link Farms - These have real links to pages that you were looking for in the first place. You might call them a 'monkey in the middle' Link Farm. What is the point, if they did not exist you would have gone where you wanted to go in the first place.
PDF Link Farms - these scour the web for PDF files, then they sort them and then they create web pages of links to these PDF files. These mess with Google's ranking by skewing search terms towards the pages with the pdf files because 'linked pages' are rated higher by Google.
All of these link farms have one purpose in mind. To get you to see their advertisements for 'Pay Per View' or 'Pay per Click' so that they can make money off your searching usually without giving you want you wanted.
The other day I came across one that really 'got my goat' I was searching for some SEO help and I noticed that several of the sites all went to the same web site in one way or another. So I was talking with one of their salesman and he said that they own over 1,000 domain names that have only one page and they in turn all point to their 'real' web site.
So there it is, follow these terrible examples and you too can be the next Internet millionaire!
Wednesday, January 12, 2011
Super Thumper rebuilt again
I was using my 'thumper' the other day and the diodes shorted out. After looking at the schematic I realized that the diodes were taking the full force of the reverse EMS off the coil. I changed the schematic to fix that bug.
 Also I was able to purchase on Ebay about 50 of 390 uF 400 volt capacitors. Thats enough to build five of these devices. Here is what the rebuilt one looks like.
 This is what it used to look like before I rebuilt it.

I hope to build another one that will use a 24 VAC AC adapter to power it. This change will make it even more electrically safe that the current setup.


I hope to build another one that will use a 24 VAC AC adapter to power it. This change will make it even more electrically safe that the current setup.
Tuesday, January 11, 2011
Targus PA248UI laptop cooler repair.
My daughters Targus PA248UI laptop cooler stopped working. The problem was that the AC adapter jack had become completely unsoldered. Click on the picture and you can see that all three pins are no longer soldered in.

The secret to getting it apart is to remove the 8 screws that are located under the rubber bumpers.


The secret to getting it apart is to remove the 8 screws that are located under the rubber bumpers.

New bathroom to replace cast iron tub.
My brother decided to replace the cast iron tub in his bathroom. The old tub had to be broken into pieces to be removed. Needless to say the project grew to replacing the floor under the tub and redoing the entire bathroom. Here is the empty bathroom.

The new tub was designed to fit together precisely and not leak.
 While he was at it a new sink was a good idea.


The new tub was designed to fit together precisely and not leak.


Monday, January 3, 2011
Dodge Caravan fan only works on high.
I have come across this problem a couple of times. On a 2000 dodge the resistor block is to the left of the engine just below the wiper assembly and mounted onto the firewall. It has 2 clips that hold it in place.
On the 2001 or 2002 grand caravans it is located behind the glove box. There are two catch pins at the top sides of the glove box that push in and then the glove box drops down revealing the fan control resistor block. Some fan controls use resistors (That resemble coils) and some have the new solid state version. They are interchangeable. The resistor model may be repairable. I think it is the thermal fuse that goes bad. Just replace it with a new on from Radio Shack. The fan speed control block is dead center in the picture below. Remove two wire plugs and two screws to remove it.

On the 2001 or 2002 grand caravans it is located behind the glove box. There are two catch pins at the top sides of the glove box that push in and then the glove box drops down revealing the fan control resistor block. Some fan controls use resistors (That resemble coils) and some have the new solid state version. They are interchangeable. The resistor model may be repairable. I think it is the thermal fuse that goes bad. Just replace it with a new on from Radio Shack. The fan speed control block is dead center in the picture below. Remove two wire plugs and two screws to remove it.

Wednesday, December 29, 2010
Replacing a mobile home water heater with a normal one.
How to Replace a mobile home water heater with a 'normal' one.
1. Remove power (or turn off the gas).
2. Turn off water (Likely for the whole home).
3. Drain the old heater (if water is hot run it out first until it is cold).
4. remove the electric power or gas lines to the heater.
5. Cut the water lines to the heater.
6. Remove the old water heater.
7. Level the floor under the heater.
8. Remove the new heater from the box and Install it.
9. Add the cold water shut off valve.
10. Add pipes to go to the top of the heater.
You will need the following;
10 feet of pipe.
4 x 90 degree elbows.
2 x Male 3/4 inch connectors.
1 x Shut off valve.
1 x Union.
11. Fill with water and check the fittings - the top fittings leak the most.
Add more Teflon tape and re-do the top fittings.
12. When the tank is full and not leaking run the hot water for SEVERAL minutes.
13. Reconnect electricity or gas lines.
14. Turn on electricity or gas.
15. The water should be hot in about 15 minutes.
Note: The old trailer heater had one 4500 watt heater element, the new standard heater had 2 x 3500 watt heat elements. Trailer heaters have the water connectors on the front, normal heaters have the fittings on the top.
First the old heater. Note that it has been leaking by all the stains on the floor.
 Next the new heater. Note the old gray pipe as a shim to level it and the shut off on the cold water coming into the tank. It looks like someday I might need to rotate it a little to access the heater elements?

1. Remove power (or turn off the gas).
2. Turn off water (Likely for the whole home).
3. Drain the old heater (if water is hot run it out first until it is cold).
4. remove the electric power or gas lines to the heater.
5. Cut the water lines to the heater.
6. Remove the old water heater.
7. Level the floor under the heater.
8. Remove the new heater from the box and Install it.
9. Add the cold water shut off valve.
10. Add pipes to go to the top of the heater.
You will need the following;
10 feet of pipe.
4 x 90 degree elbows.
2 x Male 3/4 inch connectors.
1 x Shut off valve.
1 x Union.
11. Fill with water and check the fittings - the top fittings leak the most.
Add more Teflon tape and re-do the top fittings.
12. When the tank is full and not leaking run the hot water for SEVERAL minutes.
13. Reconnect electricity or gas lines.
14. Turn on electricity or gas.
15. The water should be hot in about 15 minutes.
Note: The old trailer heater had one 4500 watt heater element, the new standard heater had 2 x 3500 watt heat elements. Trailer heaters have the water connectors on the front, normal heaters have the fittings on the top.
First the old heater. Note that it has been leaking by all the stains on the floor.


Tuesday, December 21, 2010
PHP website attacks
I looked at our logs recently and was surprised that the normal visitors had jumped from 250 a day to 550 on one day. Then I checked the error log and found this:
 It is a new web site attack targeting PHP and Wordpress. The evidence is that the lines all end in "//scripts/setup.php". They attempt to target your PHP version then your WordPress version.

Asus EEE disassembly / teardown / crack open
How to disassemble the Asus EEE.
To start with remove the battery and find the four catches located under the battery. Unlock them and they should stay that way so you can remove the keyboard. Under the keyboard are about 6 screws. On the bottom of the laptop there are 4 screws. Inside of the memory compartment on the bottom there is one more screw. Two of the catches are shown in the picture below. Unplug the keyboard and remove it.
 After you remove the 6 screws that are under the keyboard the top half comes apart by undoing the several catches located around the outer edge. You might need a small flat blade screwdriver to unhook them. Disconnect the touchpad as you lift off the top half.
 Once the top is off the screen can be unplugged. Unscrew the wireless adapter. Remove two screws one is hidden under the ribbon cable. Remove three screws and remove the cooling fan. You should now be able to remove the motherboard.
 I was taking it apart to fix a broken power jack. However the jack was fine the problem was the AC adapter. The outer braid goes bad about 1/2 an inch short of the plug. You could likely fix it by removing the insulation and wrapping the ground braid in some fine like 22 gauge copper wire.

To start with remove the battery and find the four catches located under the battery. Unlock them and they should stay that way so you can remove the keyboard. Under the keyboard are about 6 screws. On the bottom of the laptop there are 4 screws. Inside of the memory compartment on the bottom there is one more screw. Two of the catches are shown in the picture below. Unplug the keyboard and remove it.


Subscribe to:
Posts (Atom)