I am working with the MAX30100 and MAX30102 Blood Oxygen SPO2 Detectors trying to get them to work. First I bought the MAX30100 and then later the MAX30102 but they did not work. I have tried several libraries to no avail. Then, finally, I came across the issue that the 4.7K pull up resistors are tied to 1.8 volts and they are not high enough for a five volt processor.
The first solution is to remove the three 4.7K resistors (marked 472 in the picture) and replace them with external 4.7K resistors to 3.3 or even 5 volts. The second solution is to cut the run connecting them to 1.8 volts and jumper them over to the 3.3 volt regulator. The run to cut is marked in yellow in the following picture and then add the jumper marked in red.
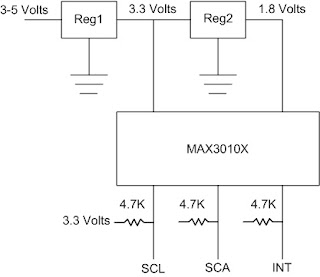
This is a simplified schematic of the circuit board. Basically there are two voltage regulators.
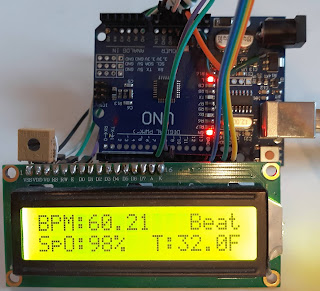
Once that change is made the MAX30100 works great. The "Minimum" example gives beat detection, BPM and SPO2 to the Arduino serial monitor. Just add a little code and redirect it to a LCD and this is what you get.
However the MAX30102 requires a different library and I could not find one nearly as good as the library for the MAX30100. Someone has commented that not only is the device ID different (15 instead of 11) but the register addresses are also different. Well, not only that, but the register for the LED's changes to one register (4 bits per LED) to two registers (8 bits per LED)!
I decided to fork the MAX30100 library and make it into a MAX30102 library. It is not nearly as easy as changing the register numbers! Here is what I have done so far:
1. Copy all src files and rename them as MAX20102_XXXX
2. Edit all src files contents to replace MAX30100 wit MAX30102
3. Change device ID from 11 to 15
4. Change registers as follows:
A. 01->02
B 02->04
C 03->05
D 04->06
E 05->07
F 06->09
G 07->0A
H 09->0C and 0D
I 16->1F
J 17->20
5. Create second LED2_PA register (addx 0D above)
6. Biggest issue: MAX30100 has 16 bit analog converters fitting into 2 byte transfers.
MAX30102 has 18 bit analog converters fitting into 3 byte transfers!
Here is the solution (I think) I wasted 2 bits of data but fit it into 16 bits:
.ir=(uint16_t)((buffer[i*6]<<14)|(buffer[i*6+1]<<6)|buffer[i*6+2]>>2),
.red=(uint16_t)((buffer[i*6+3]<<14)|(buffer[i*6+4]<<6)|buffer[i*6+5]>>2) });


