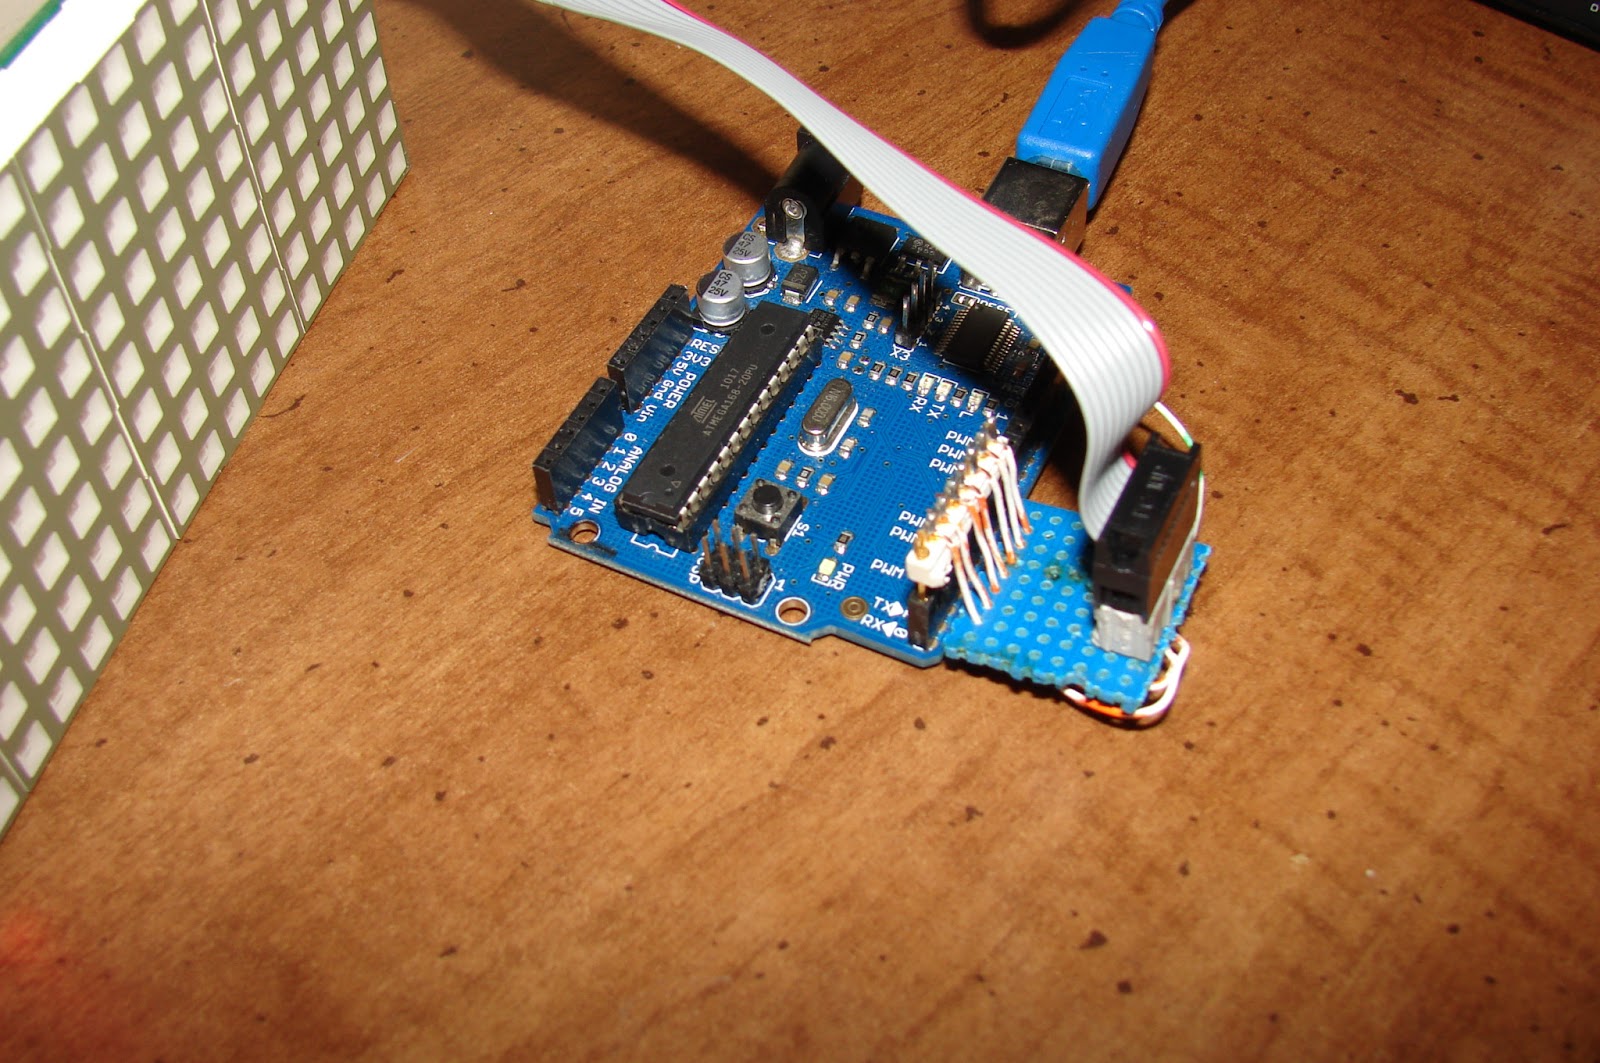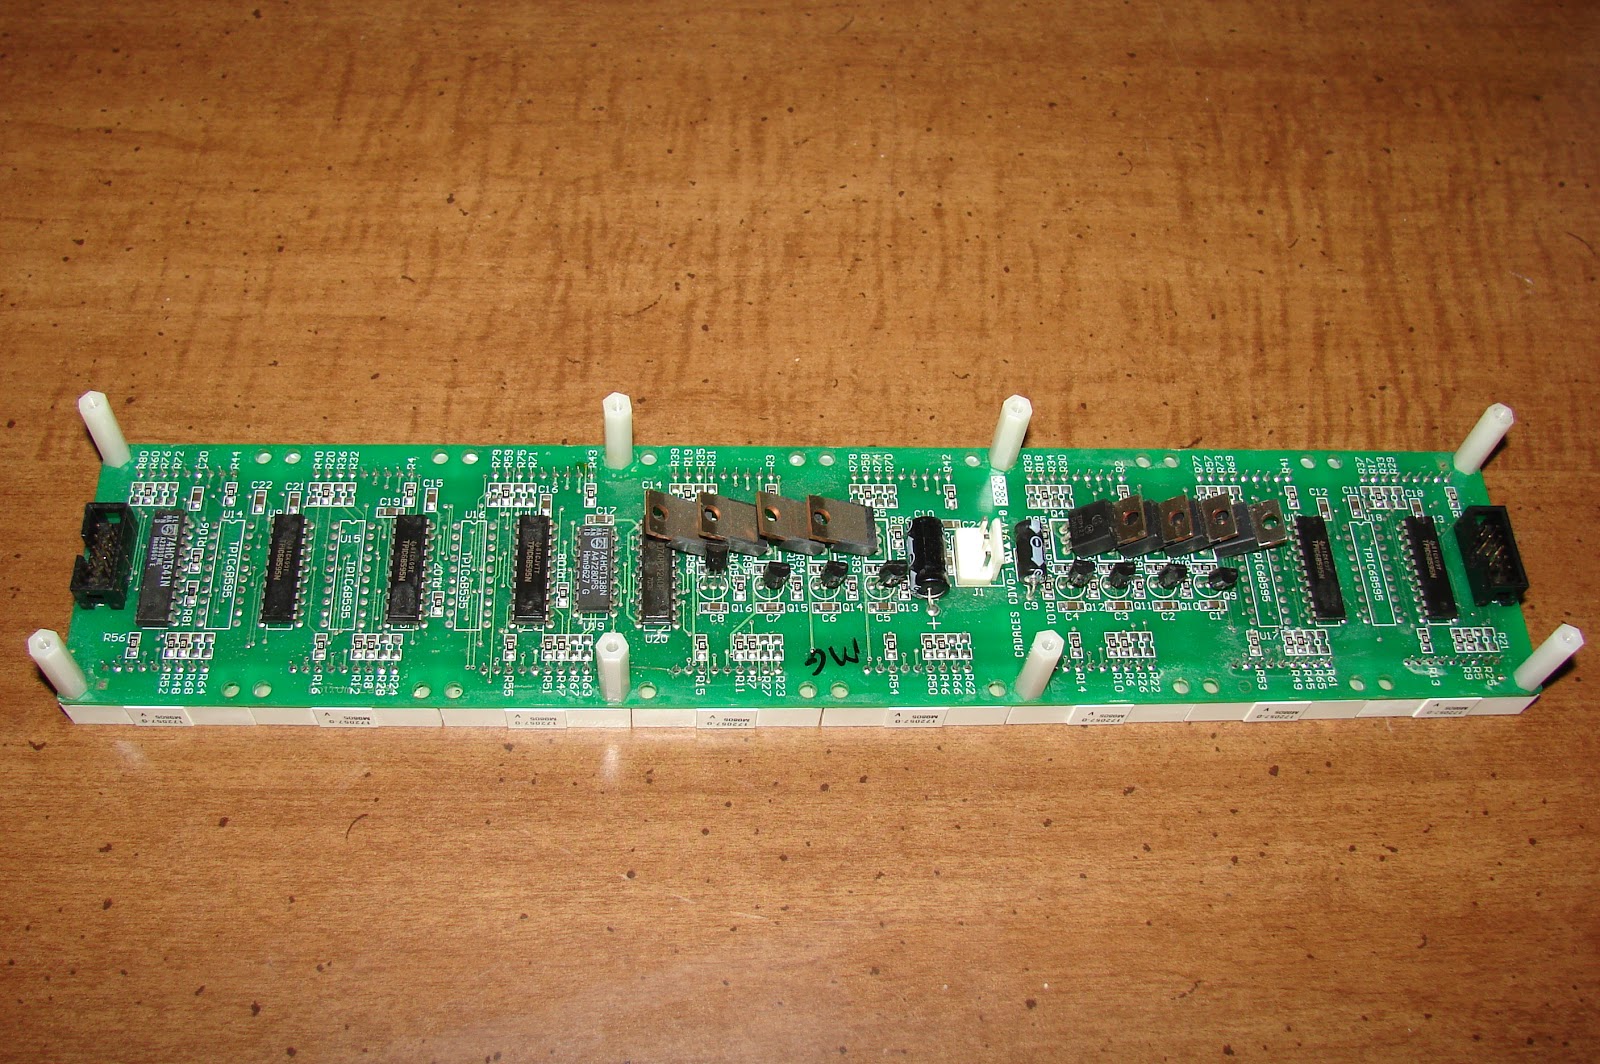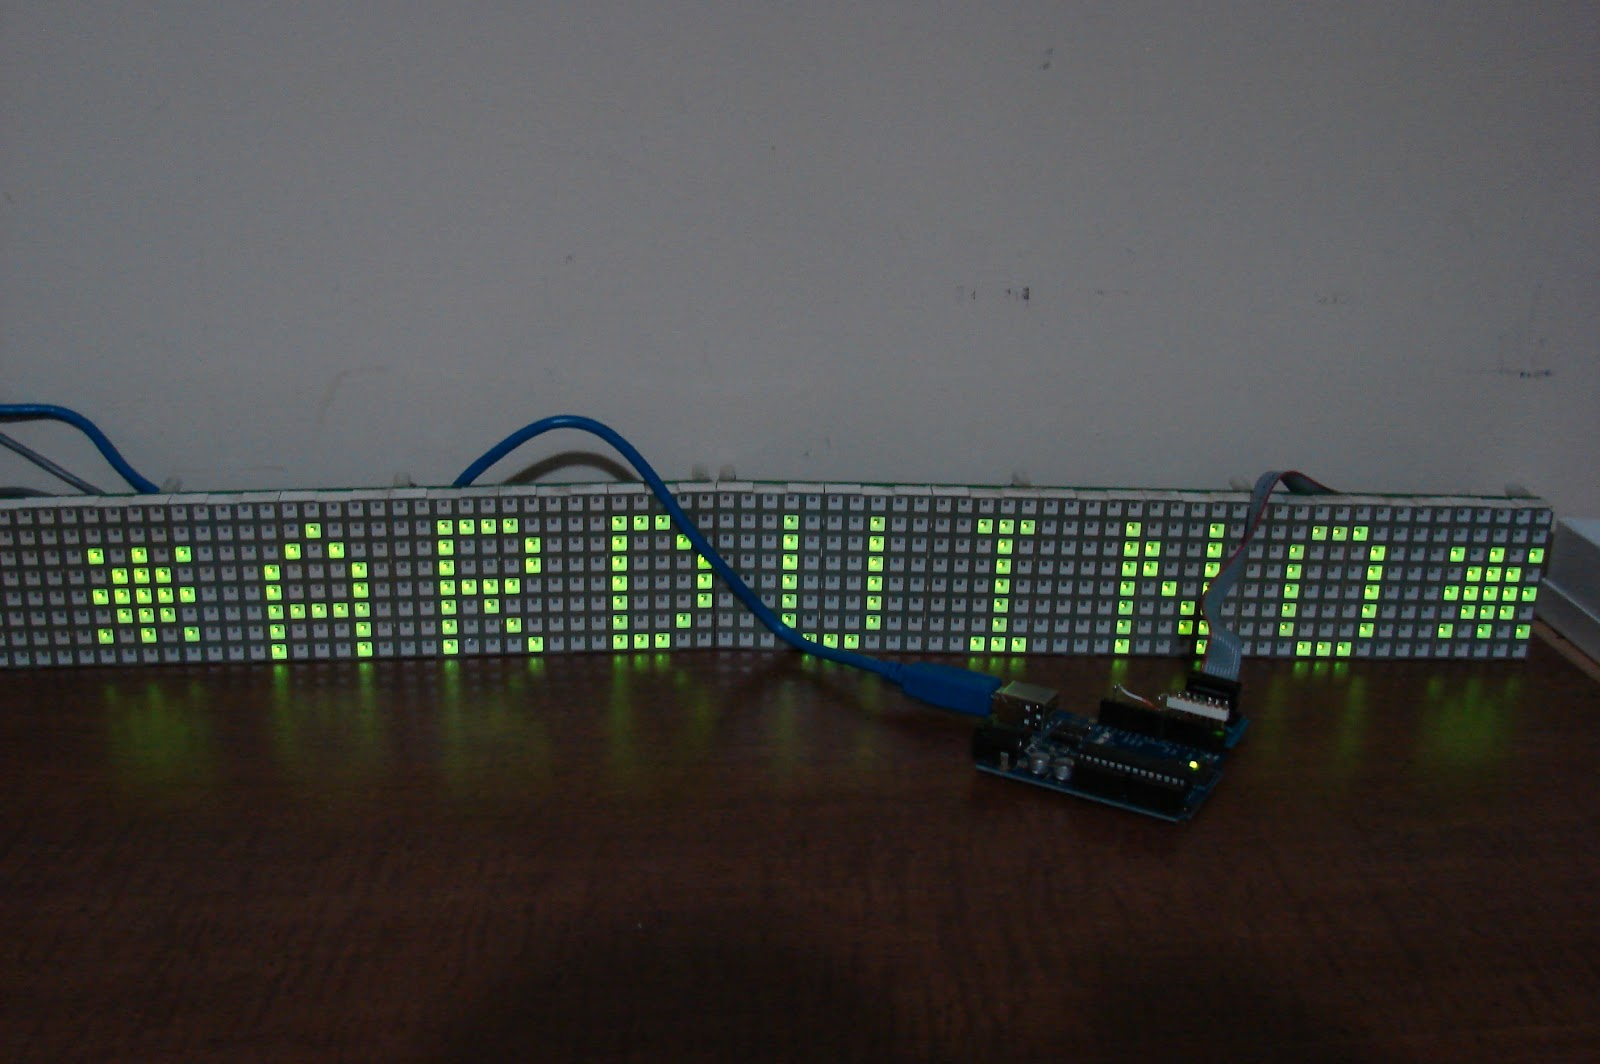
I have obtained several dual color Cadaces modules. I will be selling them on eBay soon. Here is a sign in red:
Here it is again this time in green. The green is not as bright as the red.
Here it is with both colors alternating. They do not work correctly because the Arduino serial out does not support sending both the red and green data using the same clock. What happens is the right most part of the previous color is dragged through the background.
Here is a picture of the working sign. It was taken with my phone camera so the quality is lacking. I wrote my own version of the serial output to support different data for red and green to get it to work.
Here is a better picture of the working sign.
Here is an updated schematic with the addition of "GSD" or Green Serial Data.
Here is the dual color code, note that I replaced serialout with my own code to do the same job:
//****************************************************//
// Name : Color Cadaces Driver //
// Author : Bob Davis //
// Date : 23 February, 2013 //
// Version : 1.0 //
//****************************************************//
// Pins for the row drivers
int row1Pin = 1;
int row2Pin = 2;
int row3Pin = 3;
int rowEnable = 4;
int rclockPin = 5;
int clockPin = 6;
int dataPin = 7;
int gdataPin = 8;
// Set the pins to output to the sign
void setup() {
pinMode(row1Pin, OUTPUT);
pinMode(row2Pin, OUTPUT);
pinMode(row3Pin, OUTPUT);
pinMode(rowEnable, OUTPUT);
pinMode(rclockPin, OUTPUT);
pinMode(clockPin, OUTPUT);
pinMode(dataPin, OUTPUT);
pinMode(gdataPin, OUTPUT);
}
//=== Character Array ===
// Characters are A, B, C, etc. Only upper case, no symbols.
byte alphabets[][8] = {
{0, 04, 10, 17, 17, 31, 17, 17}, //A
{0, 30, 17, 17, 30, 17, 17, 30}, //B
{0, 14, 17, 16, 16, 16, 17, 14}, //C
{0, 28, 18, 17, 17, 17, 18, 28}, //D
{0, 31, 16, 16, 31, 16, 16, 31}, //E
{0, 31, 16, 16, 31, 16, 16, 16}, //F
{0, 14, 17, 16, 16, 19, 17, 14}, //G
{0, 17, 17, 17, 31, 17, 17, 17}, //H
{0, 14, 04, 04, 04, 04, 04, 14}, //I
{0, 07, 02, 02, 02, 02, 10, 14}, //J
{0, 17, 18, 20, 24, 20, 18, 17}, //K
{0, 16, 16, 16, 16, 16, 16, 31}, //L
{0, 10, 21, 21, 21, 17, 17, 17}, //M
{0, 17, 25, 25, 21, 19, 19, 17}, //N
{0, 14, 17, 17, 17, 17, 17, 14}, //O
{0, 30, 17, 17, 30, 16, 16, 16}, //P
{0, 14, 17, 17, 17, 17, 19, 15}, //Q
{0, 30, 17, 17, 30, 20, 18, 17}, //R
{0, 14, 17, 16, 14, 01, 17, 14}, //S
{0, 31, 04, 04, 04, 04, 04, 04}, //T
{0, 17, 17, 17, 17, 17, 17, 14}, //U
{0, 17, 17, 17, 10, 10, 10, 04}, //V
{0, 17, 17, 17, 21, 21, 21, 10}, //W
{0, 17, 17, 10, 04, 10, 17, 17}, //X
{0, 17, 10, 10, 04, 04, 04, 04}, //Y
{0, 31, 8, 04, 02, 04, 8, 31}, //Z
{0, 0, 21, 14, 31, 14, 21, 0}, //*
};
byte bitmap[][8] = { //red characters
{0, 0,0,0,0,0,0,0},
{0, 4, 10, 17, 17, 31, 17, 17}, //A
{0, 30, 17, 17, 30, 20, 18, 17}, //R
{0, 28, 18, 17, 17, 17, 18, 28}, //D
{0, 0,0,0,0,0,0,0},
{0, 14, 04, 04, 04, 04, 04, 14}, //I
{0, 17, 25, 25, 21, 19, 19, 17}, //N
{0, 14, 17, 17, 17, 17, 17, 14}, //O
{0, 0,0,0,0,0,0,0},
{0, 14, 17, 16, 14, 01, 17, 14}, //S
{0, 0,0,0,0,0,0,0},
{0, 14, 17, 16, 16, 19, 17, 14}, //G
{0, 17, 25, 25, 21, 19, 19, 17}, //N
{0, 0,0,0,0,0,0,0},
};
byte gbitmap[][8] = { //green characters
{0, 0,0,0,0,0,0,0},
{0, 4, 10, 17, 17, 31, 17, 17}, //A
{0, 30, 17, 17, 30, 20, 18, 17}, //R
{0, 0,0,0,0,0,0,0},
{0, 17, 17, 17, 17, 17, 17, 14}, //U
{0, 14, 04, 04, 04, 04, 04, 14}, //I
{0, 0,0,0,0,0,0,0},
{0, 14, 17, 17, 17, 17, 17, 14}, //O
{0, 0,0,0,0,0,0,0},
{0, 14, 17, 16, 14, 01, 17, 14}, //S
{0, 14, 04, 04, 04, 04, 04, 14}, //I
{0, 0,0,0,0,0,0,0},
{0, 17, 25, 25, 21, 19, 19, 17}, //N
{0, 0,0,0,0,0,0,0},
};
void RunSign()
{
for (int row = 7; row > 0; row--)
{
// turn off display
digitalWrite(rowEnable, HIGH);
digitalWrite(rclockPin, LOW);
// send serial data to display 14 = number of characters
for (int character = 0; character < 14; character++)
{
for (int shiftbit = 5; shiftbit > -1; shiftbit--){
if bitRead(gbitmap[character][row],shiftbit) digitalWrite(gdataPin, HIGH); else digitalWrite(gdataPin, LOW);
if bitRead(bitmap[character][row],shiftbit) digitalWrite(dataPin, HIGH); else digitalWrite(dataPin, LOW);
digitalWrite(clockPin, HIGH); digitalWrite(clockPin, LOW);
}
}
//latch the data
digitalWrite(rclockPin, HIGH);
// set up 74138 row sesection and turn display back on
if bitRead(row,0) digitalWrite (row1Pin, HIGH); else digitalWrite(row1Pin, LOW);
if bitRead(row,1) digitalWrite (row2Pin, HIGH); else digitalWrite(row2Pin, LOW);
if bitRead(row,2) digitalWrite (row3Pin, HIGH); else digitalWrite(row3Pin, LOW);
digitalWrite(rowEnable, LOW);
// Wait to see what we sent to the display ;
delayMicroseconds(500);
}
}
//=== L O O P ===
void loop() {
RunSign();
}
Wednesday, February 27, 2013
Wednesday, February 20, 2013
Signature Electronic LED Sign to Arduino part 4
*** BREAKING NEWS!!! *** The next batch of Cadaces modules are RED and GREEN in color. This will require an updated adapter and updated software. More to come as soon as I get it working!
Here are some additional pictures of the Arduino to Cadaces adapter. Hopefully these are clear enough so you can make your own. The two unused pins are for optional green LED's.
Several people have asked for a scrolling version of the software for the Cadaces modules to work with an Arduino processor. So here it is:
Here are some additional pictures of the Arduino to Cadaces adapter. Hopefully these are clear enough so you can make your own. The two unused pins are for optional green LED's.
Several people have asked for a scrolling version of the software for the Cadaces modules to work with an Arduino processor. So here it is:
//**************************************************************//
// Name : Scrolling Driver //
// Author : Bob Davis //
// Date : 2 January, 2013 //
// Version : 1.0 //
// Based on work of Hari Wiguna - http://g33k.blogspot.com/ //
//**************************************************************
// Pins for the row drivers, shift registers
int row1Pin = 1;
int row2Pin = 2;
int row3Pin = 3;
int rowEnable = 4;
int rclockPin = 5;
int clockPin = 6;
int dataPin = 7;
// Set the pins to output to the circuit
void setup() {
pinMode(clockPin, OUTPUT);
pinMode(dataPin, OUTPUT);
pinMode(row1Pin, OUTPUT);
pinMode(row2Pin, OUTPUT);
pinMode(row3Pin, OUTPUT);
pinMode(rowEnable, OUTPUT);
pinMode(rclockPin, OUTPUT);
}
//=== B I T M A P ===
// Bits in this array represents one LED of the matrix
// 8 is number of rows, 10 is number of LED matrixes we have
byte bitmap[8][10];
// Change the 10 to however many matrices you want to use.
int numZones = sizeof(bitmap) / 8;
// I will refer to each group of 8 columns as a Zone.
int maxZoneIndex = numZones-1;
int numCols = numZones * 8;
//=== F O N T ===
// Font courtesy of aspro648
// http://www.arduino.cc/cgi-bin/yabb2/YaBB.pl?num=1203747843/22
// First char is @, next is A, B, etc. Only upper case, no symbols.
// The @ will display as space character.
byte alphabets[][5] = {
{0,0,0,0,0},
{31, 36, 68, 36, 31},
{127, 73, 73, 73, 54},
{62, 65, 65, 65, 34},
{127, 65, 65, 34, 28},
{127, 73, 73, 65, 65},
{127, 72, 72, 72, 64},
{62, 65, 65, 69, 38},
{127, 8, 8, 8, 127},
{0, 65, 127, 65, 0},
{2, 1, 1, 1, 126},
{127, 8, 20, 34, 65},
{127, 1, 1, 1, 1},
{127, 32, 16, 32, 127},
{127, 32, 16, 8, 127},
{62, 65, 65, 65, 62},
{127, 72, 72, 72, 48},
{62, 65, 69, 66, 61},
{127, 72, 76, 74, 49},
{50, 73, 73, 73, 38},
{64, 64, 127, 64, 64},
{126, 1, 1, 1, 126},
{124, 2, 1, 2, 124},
{126, 1, 6, 1, 126},
{99, 20, 8, 20, 99},
{96, 16, 15, 16, 96},
{67, 69, 73, 81, 97},
};
//=== F U N C T I O N S ===
// This routine takes whatever is in the bitmap array and display it on the matrix
void RefreshDisplay()
{
for (int row = 0; row < 8; row++) {
//-- turn off the display --
digitalWrite(rowEnable, HIGH);
//-- Shift out to each matrix (zone is 8 columns represented by one matrix)
for (int zone = maxZoneIndex; zone >= 0; zone--) {
shiftOut(dataPin, clockPin, MSBFIRST, bitmap[row][zone]);
}
digitalWrite(rclockPin, LOW); digitalWrite(rclockPin, HIGH);
//-- turn the current row on --
if bitRead(row,0) digitalWrite (row1Pin, HIGH); else digitalWrite(row1Pin, LOW);
if bitRead(row,1) digitalWrite (row2Pin, HIGH); else digitalWrite(row2Pin, LOW);
if bitRead(row,2) digitalWrite (row3Pin, HIGH); else digitalWrite(row3Pin, LOW);
digitalWrite(rowEnable, LOW);
//-- Wait a little bit to let humans see
delayMicroseconds(500);
}
}
// Converts row and colum to actual bitmap bit and turn it off/on
void Plot(int col, int row, bool isOn)
{
int zone = col / 8;
int colBitIndex = col % 8;
byte colBit = 1 << colBitIndex;
if (isOn)
bitmap[row][zone] = bitmap[row][zone] | colBit;
else
bitmap[row][zone] = bitmap[row][zone] & (~colBit);
}
// Plot each character of the message, updated the display, shift bitmap left.
void AlphabetSoup()
{
char msg[] = "ARDUINO LED SIGN";
//load in the characters
for (int charIndex=(sizeof(msg)-1); charIndex >= 0 ; charIndex--)
{
int alphabetIndex = msg[charIndex] - '@';
if (alphabetIndex < 0) alphabetIndex = 0;
//-- Draw one character of the message --
// Each character is only 5 columns wide
for (int col = 5; col >= 0; col--)
{
for (int row = 0; row < 8; row++)
{
// Set the pixel to the alphabet for columns 0 thru 4
bool isOn = 0;
if (col<5) isOn = bitRead( alphabets[alphabetIndex][col], 7-row ) == 1;
Plot( numCols-1, row, isOn);
}
//-- The more times you repeat this loop, the slower we would scroll --
for (int refreshCount=0; refreshCount < 50; refreshCount++)
RefreshDisplay();
//-- Shift the bitmap one column to left --
for (int row=0; row<8; row++) //right shift
{
for (int zone=0; zone < numZones; zone++)
{
// This right shift would show a left scroll on display.
bitmap[row][zone] = bitmap[row][zone] >> 1; //right shift
// Roll over lowest bit from the next zone as highest bit of this zone.
if (zone < maxZoneIndex) bitWrite(bitmap[row][zone],7,bitRead(bitmap[row][zone+1], 0));
}
}
}
}
}
//=== L O O P ===
void loop() {
AlphabetSoup();
}
Thursday, February 7, 2013
Going back to school at 56.
0n November 1 of 2012 I went to work as usual. There was a strange announcement made for me
to come to the main office area. I
hesitated for a second thinking to myself “Is this it?” The request was so unusual that I could not
help but think that I was about ready to be fired. When I arrived I was escorted to the break area
and it was totally empty. Then the new lady form HR showed up and she was very
nervous. By now I was sure that I knew
what was about ready to happen. I did
what I had already done twice that day for two other people, I started
reassuring her that everything was going to be alright, and there was no real
problem. Besides I was expecting this
and I was ready to go.
I had worked there for 3 and ½ years. There were currently about 35 employees and
only 6 of them had been there longer than I had. One of them was the boss’s wife. It was the kind of place where you either move
up to a better job elsewhere or you will get fired. The president of the company regularly spied
on everyone, reading their emails etc. I
even found a “keyboard logger” installed on my computer several times over the
years. I knew that you really had to “watch
your back”.
The same day that I lost my job I went looking for a new job
and tried to apply for unemployment by visiting the “UI” (Unemployment
Insurance) office. I found out that you
have to apply for unemployment on the Internet.
There are many pages of information that you have to fill out to
apply. I was turned down for
unemployment three times. The first time
was because I was laid off on a Thursday.
Because I had “worked” 4 days that week I did not qualify for
unemployment and I had to start the entire process all over again. The next time I was denied benefits was
because I was fired for “reasons other than lack of work”. This time all I had to do was to appeal the
decision and show that I was fired for no real reason at all. Finally after a month of trying I was able to
get unemployment.
Once on unemployment I was summoned to the unemployment
office for counseling. When I visited
the unemployment office they said that there were several options available for
me to pursue. One of those options was
to go back to school. There was an
underused $8000 grant available to go back to school. This option even included an extension in the
unemployment benefits. The catch was
that you had to take engineering classes to study for a degree in an
engineering field. Since I did not have
a degree this sounded like a good option.
I did have 7 years of college level education, but none of the places
where I had studied at offered a degree back when I went there.
I was told that I could take these classes at the local community
college that was only about three blocks from my house. I needed to sign up quickly as it was mid
December. There were three more problems
I had to overcome. One was that the actual
engineering classes were at the main branch of the community college, over an
hour drive away. The next problem was that
I had to take a test to get back into college, and the third problem was that
it was now January; I would be starting in the second semester without taking
the first semester classes that were a prerequisite.
I took the “Compass” test to test my ability in English and
math. It is taken on a computer. The program seems to know how well you are
doing and give you questions to find just where your abilities fall. When I got to the math I knew I was in
trouble. It only gave me a few math questions then it ended the test! My test scores were 96 for reading, 95 for
writing and 31 for math…. So I went to
the library and read some books on calculus and retook the test a couple of
weeks later. This time I got a 75 in
math so I would be able to start with college math and would not have to retake
high school math all over.
The next problem was to get into the classes mid-term. I had to contact the professor to talk with
him to get permission to join the class, but he and almost everyone else was
gone on Christmas vacation. I tried
calling and emailing the professor but did not get a response. Someone finally gave me a form and told me to
go to the first class a little early and talk with the professor there. I did get an email response just hours before
attending the class. The professor
thought I could handle it but by the time the class was over I was not very
sure I could handle it!
The third problem was that the engineering classes were in Batavia,
an hour drive away. However the class
scheduling was such that I could just go there on Monday and Wednesday and
could attend two classes while I was there.
It has now been almost a month and after the initial
overload I am doing OK. I am taking only
12 credits this semester and I would recommend anyone near my age should start
with the minimum number of classes until they get used to college life. Things have changed a lot since I was last
taking college classes.
Tuesday, January 29, 2013
Signature Electronic Sign to Arduino Part 3
Several people have asked for more information on the Arduino to Cadaces/Signature Electronics Sign interface. So I am posting a third time on the interface.
This is the schematic for a single line interface. It can run three cadaces modules, perhaps four. If you get garbage in your display, use shorter ribbon cables.This schematic is from the top side looking down at the adapter board.
This is a picture of the bottom of the interface board.
Here is a front view showing the adapter plugged into the left side of the Arduino.
This is a top view of the adapter board.
Here is the code for running two cadaces modules:
//****************************************************//
// Name : Cadaces Driver //
// Author : Bob Davis //
// Date : 4 January, 2013 //
// Version : 1.0 //
//****************************************************//
// Pins for the row drivers
int row1Pin = 1;
int row2Pin = 2;
int row3Pin = 3;
int rowEnable = 4;
// Pins for column shift registers
int rclockPin = 5;
int clockPin = 6;
int dataPin = 7;
// Set the pins to output to the sign
void setup() {
pinMode(row1Pin, OUTPUT);
pinMode(row2Pin, OUTPUT);
pinMode(row3Pin, OUTPUT);
pinMode(rowEnable, OUTPUT);
pinMode(rclockPin, OUTPUT);
pinMode(clockPin, OUTPUT);
pinMode(dataPin, OUTPUT);
}
//=== Character Array ===
// Characters are A, B, C, etc. Only upper case, no symbols.
byte alphabets[][8] = {
{0, 04, 10, 17, 17, 31, 17, 17}, //A
{0, 30, 17, 17, 30, 17, 17, 30}, //B
{0, 14, 17, 16, 16, 16, 17, 14}, //C
{0, 28, 18, 17, 17, 17, 18, 28}, //D
{0, 31, 16, 16, 31, 16, 16, 31}, //E
{0, 31, 16, 16, 31, 16, 16, 16}, //F
{0, 14, 17, 16, 16, 19, 17, 14}, //G
{0, 17, 17, 17, 31, 17, 17, 17}, //H
{0, 14, 04, 04, 04, 04, 04, 14}, //I
{0, 07, 02, 02, 02, 02, 10, 14}, //J
{0, 17, 18, 20, 24, 20, 18, 17}, //K
{0, 16, 16, 16, 16, 16, 16, 31}, //L
{0, 10, 21, 21, 21, 17, 17, 17}, //M
{0, 17, 25, 25, 21, 19, 19, 17}, //N
{0, 14, 17, 17, 17, 17, 17, 14}, //O
{0, 30, 17, 17, 30, 16, 16, 16}, //P
{0, 14, 17, 17, 17, 17, 19, 15}, //Q
{0, 30, 17, 17, 30, 20, 18, 17}, //R
{0, 14, 17, 16, 14, 01, 17, 14}, //S
{0, 31, 04, 04, 04, 04, 04, 04}, //T
{0, 17, 17, 17, 17, 17, 17, 14}, //U
{0, 17, 17, 17, 10, 10, 10, 04}, //V
{0, 17, 17, 17, 21, 21, 21, 10}, //W
{0, 17, 17, 10, 04, 10, 17, 17}, //X
{0, 17, 10, 10, 04, 04, 04, 04}, //Y
{0, 31, 8, 04, 02, 04, 8, 31}, //Z
};
byte bitmap[][8] = {
{0, 0,0,0,0,0,0,0},
{0, 0,0,0,0,0,0,0},
{0, 4, 10, 17, 17, 31, 17, 17}, //A
{0, 30, 17, 17, 30, 20, 18, 17}, //R
{0, 28, 18, 17, 17, 17, 18, 28}, //D
{0, 17, 17, 17, 17, 17, 17, 14}, //U
{0, 14, 04, 04, 04, 04, 04, 14}, //I
{0, 17, 25, 25, 21, 19, 19, 17}, //N
{0, 14, 17, 17, 17, 17, 17, 14}, //O
{0, 0,0,0,0,0,0,0},
{0, 0,0,0,0,0,0,0},
};
void RunSign()
{
for (int row = 7; row > 0; row--)
{
// turn off display
digitalWrite(rowEnable, HIGH);
// send serial data to display 10 = number of led arrays
for (int character = 0; character < 11; character++)
{
shiftOut(dataPin, clockPin, MSBFIRST, bitmap[character][row]);
}
//latch the data
digitalWrite(rclockPin, LOW); digitalWrite(rclockPin, HIGH);
// set up 74138 row sesection and turn display back on
digitalWrite(row1Pin, LOW);
digitalWrite(row2Pin, LOW);
digitalWrite(row3Pin, LOW);
if (row==1 or row==3 or row==5 or row==7) digitalWrite (row1Pin, HIGH);
if (row==2 or row==3 or row==6 or row==7) digitalWrite (row2Pin, HIGH);
if (row >= 4) digitalWrite (row3Pin, HIGH);
digitalWrite(rowEnable, LOW);
// Wait to see what we sent to the display ;
delayMicroseconds(500);
}
}
//=== L O O P ===
void loop() {
RunSign();
}
This is the schematic for a single line interface. It can run three cadaces modules, perhaps four. If you get garbage in your display, use shorter ribbon cables.This schematic is from the top side looking down at the adapter board.
This is a picture of the bottom of the interface board.
Here is a front view showing the adapter plugged into the left side of the Arduino.
This is a top view of the adapter board.
Here is the code for running two cadaces modules:
//****************************************************//
// Name : Cadaces Driver //
// Author : Bob Davis //
// Date : 4 January, 2013 //
// Version : 1.0 //
//****************************************************//
// Pins for the row drivers
int row1Pin = 1;
int row2Pin = 2;
int row3Pin = 3;
int rowEnable = 4;
// Pins for column shift registers
int rclockPin = 5;
int clockPin = 6;
int dataPin = 7;
// Set the pins to output to the sign
void setup() {
pinMode(row1Pin, OUTPUT);
pinMode(row2Pin, OUTPUT);
pinMode(row3Pin, OUTPUT);
pinMode(rowEnable, OUTPUT);
pinMode(rclockPin, OUTPUT);
pinMode(clockPin, OUTPUT);
pinMode(dataPin, OUTPUT);
}
//=== Character Array ===
// Characters are A, B, C, etc. Only upper case, no symbols.
byte alphabets[][8] = {
{0, 04, 10, 17, 17, 31, 17, 17}, //A
{0, 30, 17, 17, 30, 17, 17, 30}, //B
{0, 14, 17, 16, 16, 16, 17, 14}, //C
{0, 28, 18, 17, 17, 17, 18, 28}, //D
{0, 31, 16, 16, 31, 16, 16, 31}, //E
{0, 31, 16, 16, 31, 16, 16, 16}, //F
{0, 14, 17, 16, 16, 19, 17, 14}, //G
{0, 17, 17, 17, 31, 17, 17, 17}, //H
{0, 14, 04, 04, 04, 04, 04, 14}, //I
{0, 07, 02, 02, 02, 02, 10, 14}, //J
{0, 17, 18, 20, 24, 20, 18, 17}, //K
{0, 16, 16, 16, 16, 16, 16, 31}, //L
{0, 10, 21, 21, 21, 17, 17, 17}, //M
{0, 17, 25, 25, 21, 19, 19, 17}, //N
{0, 14, 17, 17, 17, 17, 17, 14}, //O
{0, 30, 17, 17, 30, 16, 16, 16}, //P
{0, 14, 17, 17, 17, 17, 19, 15}, //Q
{0, 30, 17, 17, 30, 20, 18, 17}, //R
{0, 14, 17, 16, 14, 01, 17, 14}, //S
{0, 31, 04, 04, 04, 04, 04, 04}, //T
{0, 17, 17, 17, 17, 17, 17, 14}, //U
{0, 17, 17, 17, 10, 10, 10, 04}, //V
{0, 17, 17, 17, 21, 21, 21, 10}, //W
{0, 17, 17, 10, 04, 10, 17, 17}, //X
{0, 17, 10, 10, 04, 04, 04, 04}, //Y
{0, 31, 8, 04, 02, 04, 8, 31}, //Z
};
byte bitmap[][8] = {
{0, 0,0,0,0,0,0,0},
{0, 0,0,0,0,0,0,0},
{0, 4, 10, 17, 17, 31, 17, 17}, //A
{0, 30, 17, 17, 30, 20, 18, 17}, //R
{0, 28, 18, 17, 17, 17, 18, 28}, //D
{0, 17, 17, 17, 17, 17, 17, 14}, //U
{0, 14, 04, 04, 04, 04, 04, 14}, //I
{0, 17, 25, 25, 21, 19, 19, 17}, //N
{0, 14, 17, 17, 17, 17, 17, 14}, //O
{0, 0,0,0,0,0,0,0},
{0, 0,0,0,0,0,0,0},
};
void RunSign()
{
for (int row = 7; row > 0; row--)
{
// turn off display
digitalWrite(rowEnable, HIGH);
// send serial data to display 10 = number of led arrays
for (int character = 0; character < 11; character++)
{
shiftOut(dataPin, clockPin, MSBFIRST, bitmap[character][row]);
}
//latch the data
digitalWrite(rclockPin, LOW); digitalWrite(rclockPin, HIGH);
// set up 74138 row sesection and turn display back on
digitalWrite(row1Pin, LOW);
digitalWrite(row2Pin, LOW);
digitalWrite(row3Pin, LOW);
if (row==1 or row==3 or row==5 or row==7) digitalWrite (row1Pin, HIGH);
if (row==2 or row==3 or row==6 or row==7) digitalWrite (row2Pin, HIGH);
if (row >= 4) digitalWrite (row3Pin, HIGH);
digitalWrite(rowEnable, LOW);
// Wait to see what we sent to the display ;
delayMicroseconds(500);
}
}
//=== L O O P ===
void loop() {
RunSign();
}
Tuesday, January 15, 2013
Acer Aspire 5560 repair
My brother sent me a dead Acer Aspire 5560 laptop. I checked the power adapter and it had 19 volts. I tried another adapter just in case, but it did not help either. However after hearing that the problem is usually the AC adapter I bought another one on eBay and it fixed the laptop!
However the cooling fan in this laptop did need cleaning after only one year of use. There is one trick in dissembling it. Remove the CD rom drive, and reach inside to find a hole to push up on the keyboard. Then push in the 4 catches located at the top of the keyboard.
This is the back side of the motherboard. You can see the three screws that hold the cooling fan together. Remove them and clean out the fan.
However the cooling fan in this laptop did need cleaning after only one year of use. There is one trick in dissembling it. Remove the CD rom drive, and reach inside to find a hole to push up on the keyboard. Then push in the 4 catches located at the top of the keyboard.
This is the back side of the motherboard. You can see the three screws that hold the cooling fan together. Remove them and clean out the fan.
Monday, January 7, 2013
Signature Electronic Signs - convert to Arduino
I have removed three of the Cadaces modules and have written some new code to make them work. Next is to hard wire the interface circuitry instead of using jumper wires.
Once the controller is wired up and the sign is put back together here is what it looks like. The picture does not tell the whole story, the display blinks, and the more lines that are enabled the more it blinks. I will have to work on improving the software to fix that problem.
Here is the new Arduino controller on the left compared to the old sign controller on the right:
Here is the Arduino Controller installed into the Signature Electronic Sign. I goofed a little bit in the layout so that the ribbon cables must be flipped around backwards so that the stripe is to the right.
Here is the schematic diagram. I wired it with point to point wiring, however a circuit board or wire wrap would have been easier to do.
Last of all here is the code for the sign. It was written without scrolling and set up for up to four lines of text. It still needs some work, like the ability to convert a line of text into an array of characters automatically. I did that manually.
//****************************************************//
// Name : Cadaces Driver //
// Author : Bob Davis //
// Date : 4 January, 2013 //
// Version : 1.0 //
//****************************************************//
// Pins for the row drivers
int row1Pin = 1;
int row2Pin = 2;
int row3Pin = 3;
int rowEnable = 4;
// Pins for column shift registers
int rclockPin = 5;
int clockPin = 6;
int dataPin = 7;
int clockPin1 = 8;
int dataPin1 = 9;
int clockPin2 = 10;
int dataPin2 = 11;
int clockPin3 = 12;
int dataPin3 = 13;
// Set the pins to output to the sign
void setup() {
pinMode(row1Pin, OUTPUT);
pinMode(row2Pin, OUTPUT);
pinMode(row3Pin, OUTPUT);
pinMode(rowEnable, OUTPUT);
pinMode(rclockPin, OUTPUT);
pinMode(clockPin, OUTPUT);
pinMode(dataPin, OUTPUT);
pinMode(clockPin1, OUTPUT);
pinMode(dataPin1, OUTPUT);
pinMode(clockPin2, OUTPUT);
pinMode(dataPin2, OUTPUT);
pinMode(clockPin3, OUTPUT);
pinMode(dataPin3, OUTPUT);
}
//=== Character Array ===
// Characters are A, B, C, etc. Only upper case, no symbols.
byte alphabets[][8] = {
{0, 04, 10, 17, 17, 31, 17, 17}, //A
{0, 30, 17, 17, 30, 17, 17, 30}, //B
{0, 14, 17, 16, 16, 16, 17, 14}, //C
{0, 28, 18, 17, 17, 17, 18, 28}, //D
{0, 31, 16, 16, 31, 16, 16, 31}, //E
{0, 31, 16, 16, 31, 16, 16, 16}, //F
{0, 14, 17, 16, 16, 19, 17, 14}, //G
{0, 17, 17, 17, 31, 17, 17, 17}, //H
{0, 14, 04, 04, 04, 04, 04, 14}, //I
{0, 07, 02, 02, 02, 02, 10, 14}, //J
{0, 17, 18, 20, 24, 20, 18, 17}, //K
{0, 16, 16, 16, 16, 16, 16, 31}, //L
{0, 10, 21, 21, 21, 17, 17, 17}, //M
{0, 17, 25, 25, 21, 19, 19, 17}, //N
{0, 14, 17, 17, 17, 17, 17, 14}, //O
{0, 30, 17, 17, 30, 16, 16, 16}, //P
{0, 14, 17, 17, 17, 17, 19, 15}, //Q
{0, 30, 17, 17, 30, 20, 18, 17}, //R
{0, 14, 17, 16, 14, 01, 17, 14}, //S
{0, 31, 04, 04, 04, 04, 04, 04}, //T
{0, 17, 17, 17, 17, 17, 17, 14}, //U
{0, 17, 17, 17, 10, 10, 10, 04}, //V
{0, 17, 17, 17, 21, 21, 21, 10}, //W
{0, 17, 17, 10, 04, 10, 17, 17}, //X
{0, 17, 10, 10, 04, 04, 04, 04}, //Y
{0, 31, 8, 04, 02, 04, 8, 31}, //Z
};
byte bitmap[][8] = {
{0, 30, 17, 17, 30, 17, 17, 30}, //B
{0, 14, 04, 04, 04, 04, 04, 14}, //I
{0, 14, 17, 16, 16, 19, 17, 14}, //G
{0, 0,0,0,0,0,0,0},
{0, 4, 10, 17, 17, 31, 17, 17}, //A
{0, 30, 17, 17, 30, 20, 18, 17}, //R
{0, 28, 18, 17, 17, 17, 18, 28}, //D
{0, 17, 17, 17, 17, 17, 17, 14}, //U
{0, 14, 04, 04, 04, 04, 04, 14}, //I
{0, 17, 25, 25, 21, 19, 19, 17}, //N
{0, 14, 17, 17, 17, 17, 17, 14}, //O
{0, 0,0,0,0,0,0,0},
{0, 14, 17, 16, 14, 01, 17, 14}, //S
{0, 14, 04, 04, 04, 04, 04, 14}, //I
{0, 14, 17, 16, 16, 19, 17, 14}, //G
{0, 17, 25, 25, 21, 19, 19, 17}, //N
{0, 0,0,0,0,0,0,0},
};
void RunSign()
{
for (int row = 7; row > 0; row--)
{
// turn off display
digitalWrite(rowEnable, HIGH);
// send serial data to display 15 = number of led arrays
for (int character = 0; character < 16; character++)
{
shiftOut(dataPin, clockPin, MSBFIRST, bitmap[character][row]);
// shiftOut(dataPin1, clockPin1, MSBFIRST, bitmap[character][row]);
// shiftOut(dataPin2, clockPin2, MSBFIRST, bitmap[character][row]);
shiftOut(dataPin3, clockPin3, MSBFIRST, bitmap[character][row]);
}
//latch the data
digitalWrite(rclockPin, LOW); digitalWrite(rclockPin, HIGH);
// set up 74138 row sesection and turn display back on
digitalWrite(row1Pin, LOW);
digitalWrite(row2Pin, LOW);
digitalWrite(row3Pin, LOW);
if (row==1 or row==3 or row==5 or row==7) digitalWrite (row1Pin, HIGH);
if (row==2 or row==3 or row==6 or row==7) digitalWrite (row2Pin, HIGH);
if (row >= 4) digitalWrite (row3Pin, HIGH);
digitalWrite(rowEnable, LOW);
// Wait to see what we sent to the display ;
delayMicroseconds(500);
}
}
//=== L O O P ===
void loop() {
RunSign();
}
Once the controller is wired up and the sign is put back together here is what it looks like. The picture does not tell the whole story, the display blinks, and the more lines that are enabled the more it blinks. I will have to work on improving the software to fix that problem.
Here is the new Arduino controller on the left compared to the old sign controller on the right:
Here is the Arduino Controller installed into the Signature Electronic Sign. I goofed a little bit in the layout so that the ribbon cables must be flipped around backwards so that the stripe is to the right.
Here is the schematic diagram. I wired it with point to point wiring, however a circuit board or wire wrap would have been easier to do.
Last of all here is the code for the sign. It was written without scrolling and set up for up to four lines of text. It still needs some work, like the ability to convert a line of text into an array of characters automatically. I did that manually.
//****************************************************//
// Name : Cadaces Driver //
// Author : Bob Davis //
// Date : 4 January, 2013 //
// Version : 1.0 //
//****************************************************//
// Pins for the row drivers
int row1Pin = 1;
int row2Pin = 2;
int row3Pin = 3;
int rowEnable = 4;
// Pins for column shift registers
int rclockPin = 5;
int clockPin = 6;
int dataPin = 7;
int clockPin1 = 8;
int dataPin1 = 9;
int clockPin2 = 10;
int dataPin2 = 11;
int clockPin3 = 12;
int dataPin3 = 13;
// Set the pins to output to the sign
void setup() {
pinMode(row1Pin, OUTPUT);
pinMode(row2Pin, OUTPUT);
pinMode(row3Pin, OUTPUT);
pinMode(rowEnable, OUTPUT);
pinMode(rclockPin, OUTPUT);
pinMode(clockPin, OUTPUT);
pinMode(dataPin, OUTPUT);
pinMode(clockPin1, OUTPUT);
pinMode(dataPin1, OUTPUT);
pinMode(clockPin2, OUTPUT);
pinMode(dataPin2, OUTPUT);
pinMode(clockPin3, OUTPUT);
pinMode(dataPin3, OUTPUT);
}
//=== Character Array ===
// Characters are A, B, C, etc. Only upper case, no symbols.
byte alphabets[][8] = {
{0, 04, 10, 17, 17, 31, 17, 17}, //A
{0, 30, 17, 17, 30, 17, 17, 30}, //B
{0, 14, 17, 16, 16, 16, 17, 14}, //C
{0, 28, 18, 17, 17, 17, 18, 28}, //D
{0, 31, 16, 16, 31, 16, 16, 31}, //E
{0, 31, 16, 16, 31, 16, 16, 16}, //F
{0, 14, 17, 16, 16, 19, 17, 14}, //G
{0, 17, 17, 17, 31, 17, 17, 17}, //H
{0, 14, 04, 04, 04, 04, 04, 14}, //I
{0, 07, 02, 02, 02, 02, 10, 14}, //J
{0, 17, 18, 20, 24, 20, 18, 17}, //K
{0, 16, 16, 16, 16, 16, 16, 31}, //L
{0, 10, 21, 21, 21, 17, 17, 17}, //M
{0, 17, 25, 25, 21, 19, 19, 17}, //N
{0, 14, 17, 17, 17, 17, 17, 14}, //O
{0, 30, 17, 17, 30, 16, 16, 16}, //P
{0, 14, 17, 17, 17, 17, 19, 15}, //Q
{0, 30, 17, 17, 30, 20, 18, 17}, //R
{0, 14, 17, 16, 14, 01, 17, 14}, //S
{0, 31, 04, 04, 04, 04, 04, 04}, //T
{0, 17, 17, 17, 17, 17, 17, 14}, //U
{0, 17, 17, 17, 10, 10, 10, 04}, //V
{0, 17, 17, 17, 21, 21, 21, 10}, //W
{0, 17, 17, 10, 04, 10, 17, 17}, //X
{0, 17, 10, 10, 04, 04, 04, 04}, //Y
{0, 31, 8, 04, 02, 04, 8, 31}, //Z
};
byte bitmap[][8] = {
{0, 30, 17, 17, 30, 17, 17, 30}, //B
{0, 14, 04, 04, 04, 04, 04, 14}, //I
{0, 14, 17, 16, 16, 19, 17, 14}, //G
{0, 0,0,0,0,0,0,0},
{0, 4, 10, 17, 17, 31, 17, 17}, //A
{0, 30, 17, 17, 30, 20, 18, 17}, //R
{0, 28, 18, 17, 17, 17, 18, 28}, //D
{0, 17, 17, 17, 17, 17, 17, 14}, //U
{0, 14, 04, 04, 04, 04, 04, 14}, //I
{0, 17, 25, 25, 21, 19, 19, 17}, //N
{0, 14, 17, 17, 17, 17, 17, 14}, //O
{0, 0,0,0,0,0,0,0},
{0, 14, 17, 16, 14, 01, 17, 14}, //S
{0, 14, 04, 04, 04, 04, 04, 14}, //I
{0, 14, 17, 16, 16, 19, 17, 14}, //G
{0, 17, 25, 25, 21, 19, 19, 17}, //N
{0, 0,0,0,0,0,0,0},
};
void RunSign()
{
for (int row = 7; row > 0; row--)
{
// turn off display
digitalWrite(rowEnable, HIGH);
// send serial data to display 15 = number of led arrays
for (int character = 0; character < 16; character++)
{
shiftOut(dataPin, clockPin, MSBFIRST, bitmap[character][row]);
// shiftOut(dataPin1, clockPin1, MSBFIRST, bitmap[character][row]);
// shiftOut(dataPin2, clockPin2, MSBFIRST, bitmap[character][row]);
shiftOut(dataPin3, clockPin3, MSBFIRST, bitmap[character][row]);
}
//latch the data
digitalWrite(rclockPin, LOW); digitalWrite(rclockPin, HIGH);
// set up 74138 row sesection and turn display back on
digitalWrite(row1Pin, LOW);
digitalWrite(row2Pin, LOW);
digitalWrite(row3Pin, LOW);
if (row==1 or row==3 or row==5 or row==7) digitalWrite (row1Pin, HIGH);
if (row==2 or row==3 or row==6 or row==7) digitalWrite (row2Pin, HIGH);
if (row >= 4) digitalWrite (row3Pin, HIGH);
digitalWrite(rowEnable, LOW);
// Wait to see what we sent to the display ;
delayMicroseconds(500);
}
}
//=== L O O P ===
void loop() {
RunSign();
}
Saturday, December 29, 2012
Signature Electronic Signs Inc repair
This post is continued here: http://www.bobdavis321.blogspot.com/2013/01/signature-electronic-signs-convert-to.html
There are several Signature Electronic LED Signs for sale on EBay. I bought one that did not work and to get it working I had to add a power cord, and connect the 5 volt power to the processor board in the upper left corner.
Here is the right side of the back where the 110 Volt power is connected.
These signs are made with Cadaces CDVO-1 boards strung together. Each of those boards holds 8 of 8 by 5 LED arrays. TPIC68595 serial shift registers drive the columns and a 74HCT138 drives the rows via some TIP127's. There are 12 of these Cadaces CDVO-1 boards in the sign.
The controller card has two wires that connect it to the outside world. One is green one is blue. I have traced them out to a "485" IC. That IC is a RS422 communications chip, so likely the sign is communicated with via RS422. You will need a Serial or USB to RS422 adapter to talk to the sign.
Here is what one of the Cadaces CDVO-1 boards looks like.
Here is the back side of the Cadaces CDVO-1 board. I have metered out the pinout and hope to post that soon. Then I can work on interfacing it to an Arduino or something like that.
Here is how the Cadaces board connects to the controller.
Here is a size comparison between the new sign and the old Silent radio sign
The new sign is now working with the Arduino processor, but there is a bug when trying to run the entire sign. Each sequential board displays the same thing as the previous board, it is just scrolled down one position.
I am using the same software as with the Silent Radio sign, but with the register clock jumpered to the serial data clock, and the column selection code has been modified to work with the 74138.
There are several Signature Electronic LED Signs for sale on EBay. I bought one that did not work and to get it working I had to add a power cord, and connect the 5 volt power to the processor board in the upper left corner.
Here is the right side of the back where the 110 Volt power is connected.
The controller card has two wires that connect it to the outside world. One is green one is blue. I have traced them out to a "485" IC. That IC is a RS422 communications chip, so likely the sign is communicated with via RS422. You will need a Serial or USB to RS422 adapter to talk to the sign.
Here is what one of the Cadaces CDVO-1 boards looks like.
Here is the back side of the Cadaces CDVO-1 board. I have metered out the pinout and hope to post that soon. Then I can work on interfacing it to an Arduino or something like that.
Here is how the Cadaces board connects to the controller.
Here is a size comparison between the new sign and the old Silent radio sign
The new sign is now working with the Arduino processor, but there is a bug when trying to run the entire sign. Each sequential board displays the same thing as the previous board, it is just scrolled down one position.
I am using the same software as with the Silent Radio sign, but with the register clock jumpered to the serial data clock, and the column selection code has been modified to work with the 74138.
Sunday, December 16, 2012
Poloroid TDA-03211 3211 32 LCD TV Repair Part 2
I recently had to re-repair the Poloroid TDA-03211 3211 32 LCD TV. This time one of the tiny blue capacitors in the red circled area had shorted and turned black.
I could not read what was written on those caps so I removed them and tested them. The two good ones were about 1 pf, or at the range limit of my capacitor meter. They appeared to be 3 KV caps. So I replace the fried one with a 1 pf 3Kv capacitor and the TV still did not work.
The problem was that I had soldered one capacitor in wrong. Two of them are part of the protection circuit that detects any problems and shuts down the High Voltage. They have to be replaced properly or the set will shut off after about 5 seconds.
Here is a better picture of the power supply:
I circled the blue caps, the tan one is my replacement capacitor. Notice the large red caps, they are 2.2 uF at 400 volt paper caps that replaced the old 4 uF electrolytic caps.
I could not read what was written on those caps so I removed them and tested them. The two good ones were about 1 pf, or at the range limit of my capacitor meter. They appeared to be 3 KV caps. So I replace the fried one with a 1 pf 3Kv capacitor and the TV still did not work.
The problem was that I had soldered one capacitor in wrong. Two of them are part of the protection circuit that detects any problems and shuts down the High Voltage. They have to be replaced properly or the set will shut off after about 5 seconds.
Here is a better picture of the power supply:
I circled the blue caps, the tan one is my replacement capacitor. Notice the large red caps, they are 2.2 uF at 400 volt paper caps that replaced the old 4 uF electrolytic caps.
Friday, December 14, 2012
Dunlap Clarke Rebuild part 2
A while back I started rebuilding a Dunlap Clarke Amplifier. This is an update to the rebuild project. I stripped the cabinet almost completely bare, then cut holes in the sided for new heat sinks. Next I drilled holes for the power transformer.
Next I installed the heat sinks with the new circuit board and wired everything up. The new power transformer is 50 volt center tapped at 8 amps.
So far all I have done is a hum test. I connected speakers and tapped the input screws to produce a loud hum. Next is to wire up the input jacks and level controls.
Next I installed the heat sinks with the new circuit board and wired everything up. The new power transformer is 50 volt center tapped at 8 amps.
So far all I have done is a hum test. I connected speakers and tapped the input screws to produce a loud hum. Next is to wire up the input jacks and level controls.
Saturday, November 17, 2012
Popout Vertical Menu for WordPress website using HTML and CSS
I designed a popout vertical menu for wordpress for a previous employer but they never liked it or used it. So here it is for everyone to use! It only uses CSS and HTML so it can be used anywhere!
To see it in action, select all of the code, cut and paste it into notepad. Save it as "vertmenu.html" then find the file that you just saved and double click on it.
Here is a picture of it in action:
To see it in action, select all of the code, cut and paste it into notepad. Save it as "vertmenu.html" then find the file that you just saved and double click on it.
Here is a picture of it in action:
<style type="text/css"> #navigation {width: 180px; font-size: 1em; Font-family: arial;} #navigation ul { margin: 0px; padding: 0px; } ul.top-level { background: #CCf; } #navigation li { list-style: none; } ul.top-level li { border-bottom: #fff solid; border-top: #fff solid; border-width: 1px; } #navigation a { color: #000; cursor: pointer; display:block; height:25px; line-height: 25px; text-indent: 10px; text-decoration:none; width:100%; } #navigation a:hover{ text-decoration:underline; } #navigation li:hover {background: #DDF; position:top; } ul.sub-level { display:none; width:600px; height:220px; } li:hover .sub-level { background: #EEF; border: #fff solid; border-width: 1px; display: block; position: absolute; left: 180px; top: 5px; } ul.sub-level li { border: none; float:left; width:180px; } #navigation .sub-level { background: #EEF; } /*IE RESET HELPER*/ li:hover .sub-level .sub-level { display:none; } .sub-level li:hover .sub-level { display:block; } </style> <div id="navigation"> <ul class="top-level"> <li> <a href="http://www.gentech.com/about-gentech/" title="About us">About us</a> <ul class="sub-level"> <li> <a href="http://www.gentech.com/gentech-contact-information/" title="How to Contact GenTech ">Contact us</a> </li> <li> <a href="http://www.gentech.com/gentech-catalog/" title="GenTech Catalog">Our Catalog</a> </li> <li> <a href="http://www.gentech.com/gentech-employment/" title="GenTech Employment"> Employment Openings</a> </li> <li> <a href="http://www.gentech.com/gentech-financing/" title="GenTech Financing">Our Financing</a> </li> <li> <a href="http://www.gentech.com/guide-to-mass-specs/" title="Compare Mass Spectrometer Features">Guide to MS</a> </li> <li> <a href="http://www.gentech.com/gentech-history/" title="GenTech History">Our History</a> </li> <li class="cat-item cat-item-14"> <a href="http://www.gentech.com/gentech-terms/" title="GenTech Term and Conditions">Our Terms</a> </li> <li> <a href="http://www.gentech.com/gentech-testimonials/" title="GenTech Testimonials">Customer Testimonials</a> </li> <li> <a href="http://www.gentech.com/gentech-warranty/" title="GenTech Warranty">Our Warranty</a> </li> <li> <a href="http://www.gentech.com/10-reasons-to-choose-gentech/" title="10 Reasons to Choose GenTech">Why Choose GenTech</a> </li> <li> <a href="http://www.gentech.com/useful-links/" title="Useful Analytical Equipment Links">Useful Links</a> </li> </ul> </li> <li> <a href="http://www.gentech.com/gc/" title="Used Gas Chromatography Equipment"> GC </a> <ul class="sub-level"> <li><a href="http://www.gentech.com/category/gc/agilenthp-gc/" title="Used Agilent/HP Gas Chromatography">Agilent/HP GC</a> </li> <li> <a href="http://www.gentech.com/category/gc/perkin-elmer-gc/" title="Used Perkin Elmer Gas Chromatography">Perkin Elmer GC</a> </li> <li><a href="http://www.gentech.com/category/gc/shimadzu-gc/" title="Used Shimadzu Gas Chromatography">Shimadzu GC</a> </li> <li><a href="http://www.gentech.com/category/gc/other-gc/" title="Other Gas Chromatography Instruments">Other GC</a> </li> <li><a href="http://www.gentech.com/category/gc/gc-accessories/" title="Gas Chromatography Instrument Accessories">GC Accessories</a> </li> <li><a href="http://www.gentech.com/category/gc/gc-kits/" title="Gas Chromatography Installation Kits">GC Kits</a> </li> <li><a href="http://www.gentech.com/category/gc/gc-software/" title="Gas Chromatography Software">GC Software</a> </li> </ul> </li> <li><a href="http://www.gentech.com/hplc/" title="Used HPLC Equipment">HPLC</a> <ul class="sub-level"> <li><a href="http://www.gentech.com/category/hplc/new-hplc-systems/" title="New HPLC Systems">New HPLC Systems</a> </li> <li><a href="http://www.gentech.com/category/hplc/agilenthp-hplc/" title="Used Agilent/HP HPLC Instruments">Agilent/HP HPLC</a> </li> <li><a href="http://www.gentech.com/category/hplc/perkin-elmer-hplc/" title="Used Perkin Elmer HPLC Instruments">Perkin Elmer HPLC</a> </li> <li><a href="http://www.gentech.com/category/hplc/shimadzu-hplc/" title="Used Shimadzu HPLC Instruments">Shimadzu HPLC</a> </li> <li><a href="http://www.gentech.com/category/hplc/waters-hplc/" title="Used Waters HPLC Instruments">Waters HPLC</a> </li> <li><a href="http://www.gentech.com/category/hplc/other-hplc/" title="Other HPLC Instruments">Other HPLC </a> </li> <li><a href="http://www.gentech.com/category/hplc/hplc-kits/" title="HPLC Instruments Installation Kits">HPLC Kits</a> </li> <li><a href="http://www.gentech.com/category/hplc/hplc-software/" title="HPLC Instrument Software">HPLC Software</a> </li> </ul> </li> <li><a href="http://www.gentech.com/mass-spec/" title="Used Mass Spectrometer Equipment">Mass Spectrometer</a> <ul class="sub-level"> <li><a href="http://www.gentech.com/category/mass-spec/gcms-systems/" title="Used GC/MS Instruments">GC/MS Systems</a> </li> <li><a href="http://www.gentech.com/category/mass-spec/lcms-systems/" title="Used LC/MS Instruments">LC/MS Systems</a> </li> <li><a href="http://www.gentech.com/category/mass-spec/mass-spec-kits/" title="Mass Spec Instruments Installation Kits">Mass Spec Kits</a> </li> <li><a href="http://www.gentech.com/category/mass-spec/ms-accessories/" title="Mass Spec Instruments Accessories">MS Accessories</a> </li> </ul> </li> <li><a href="http://www.gentech.com/aaicp/" title="Used AA/ICP Equipment">AA/ICP</a> <ul class="sub-level"> <li><a href="http://www.gentech.com/category/aa-icp/atomic-absorption/" title="Used AA Instruments">Atomic Absorption</a> </li> <li><a href="http://www.gentech.com/category/aa-icp/icp/" title="Used ICP Instruments">ICP Instruments</a> </li> </ul> </li> <li><a href="http://www.gentech.com/miscellaneous/" title="Misc Analytical Instruments">Misc.</a> <ul class="sub-level"> <li><a href="http://www.gentech.com/category/misc/edwards-pumps/" title="New and Used Edwards Pumps">Edwards Pumps</a> </li> <li><a href="http://www.gentech.com/category/misc/other-instruments/" title="Other Used Instruments">Other Instruments</a> </li> <li><a href="http://www.gentech.com/category/misc/pfeiffer-pumps/" title="Used Pfeiffer Pumps">Pfeiffer Pumps</a> </li> <li><a href="http://www.gentech.com/category/misc/varian-pumps/" title="New Varian Pumps">Varian Pumps</a> </li> </ul> </li> <li><a href="http://www.gentech.com/parts-department/" title="Analytical Instrument Parts">Parts Department</a> <ul class="sub-level"> <li><a href="http://www.gentech.com/category/parts-dept/finnigan-parts/" title="Thermo Finnigan Instrument Parts">Thermo Finnigan Parts</a> </li> <li><a href="http://www.gentech.com/category/parts-dept/hp-parts/" title="HP Instrument Parts">HP Instrument Parts</a> </li> <li> <a href="http://www.gentech.com/category/parts-dept/hp-parts/1100/" title="HP 1100 HPLC Instrument Parts">&HP 1100 HPLC Parts</a> </li> <li> <a href="http://www.gentech.com/category/parts-dept/hp-parts/5890/" title="HP 5890 GC Instrument Parts">&HP 5890 GC Parts</a> </li> <li> <a href="http://www.gentech.com/category/parts-dept/hp-parts/59715972/" title="HP 5972 MS Instrument Parts">&HP 5970-72 MS Parts</a> </li> <li> <a href="http://www.gentech.com/category/parts-dept/hp-parts/5973/" title="HP 5973 MS Instrument Parts">&HP 5973 MS Parts</a> </li> <li> <a href="http://www.gentech.com/category/parts-dept/hp-parts/6890/" title="HP 6890 GC Instrument Parts">&HP 6890 GC Parts</a> </li> <li> <a href="http://www.gentech.com/category/parts-dept/hp-parts/7673/" title="HP 7673 Autosampler Parts">&HP 7673 AS Parts</a> </li> <li><a href="http://www.gentech.com/category/parts-dept/other-parts/" title="Other Scientific Instrument Parts">Other Instrument </a> </li> <li><a href="http://www.gentech.com/category/parts-dept/perkin-elmer-parts/" title="Perkin Elmer Instrument Parts">Perkin Elmer </a> </li> <li><a href="http://www.gentech.com/category/parts-dept/pfeiffer-parts/" title="Pfeiffer Instrument Parts">Pfeiffer Parts</a> </li> <li><a href="http://www.gentech.com/category/parts-dept/tekmar-parts/" title="Tekmar Instrument Parts">Tekmar Instrument Parts</a> </li> <li><a href="http://www.gentech.com/category/parts-dept/varian-parts/" title="Varian Instrument Parts">Varian Instrument Parts</a> </li> </ul> </li> <li><a href="http://www.gentech.com/services-overview/" title="Analytical Instrument Services">Services</a> <ul class="sub-level"> <li><a href="http://www.gentech.com/bench-repair/" title="Analytical Instrument Repair">Bench Repair</a> </li> <li><a href="http://www.gentech.com/installation/" title="Analytical Instrument Installation">Instrument Installation</a> </li> <li><a href="http://www.gentech.com/packing-instructions/" title="Instrument Packing Instructions">Packing Instructions</a> </li> <li><a href="http://www.gentech.com/request-service-form/" title="Request Instrument Service Form">Request Service Form</a> </li> <li><a href="http://www.gentech.com/service/" title="Instrument Service Information">Service Information</a> </li> <li><a href="http://www.gentech.com/shipping/" title="Analytical Instrument Shipping">Instrument Shipping</a> </li> <li><a href="http://www.gentech.com/circuit-board-repair" title="Analytical Circuit Board Repair">Circuit Board Repair</a> </li> </ul> </li> </ul> </div>
Thursday, November 8, 2012
New floor for a friend
Recently I installed a new floor for a friend. It is the interlocking wood floor like what I did in my living room. These came with a water seal and pad built in so installation was easier. Here are some pictures of the resulting floor.
Samsung 42 inch Plasma TV Repair Model P4231
I picked up a 42 inch plasma TV for free a few months ago. The owner was getting rid of it because it shuts off after a few hours. It eventually got so bad that it acted up after just one hour. So it was time to take it apart and fix it. Here it is with the covers removed. You have to remove the base to remove the back cover.
Here is the power supply board. You will need to remove it for servicing. First check for any blown capacitors. Then turn it over and re-solder any connections that go to anything mounted on the heat sink or that looks at all worn.
If all else fails add a cooling fan. Mine has now been running over 4 hours after re-soldering the connections.
Monday, October 29, 2012
Compaq F700 repair
Recently I had the job of fixing a Compaq F700 that overheated and shut off after about 15 minutes of operation. Needless to say the cooling fan was completely clogged with dust as can be seen in the picture below.
To get inside of this computer you need to find some hidden screws. First you remove the panel above the keyboard, then the keyboard then the CD ROM drive. There are three screws hidden above the CD ROM front edge. Then there are three screws you must remove from the bottom, two are standoffs and one is above the hard drive. I circled their locations in the picture below.
There is another screw that can only be reached from above, once the CD ROM is removed. There is a hole now available that goes down through where the CD drive had been to access a hidden screw down below. You have to remove the screen and all the usual screws to finally get the top cover off the laptop. Once you remove the main board the cooling fan screws are hidden under some black sticky plastic. They are extra small and hard to remove.
To get inside of this computer you need to find some hidden screws. First you remove the panel above the keyboard, then the keyboard then the CD ROM drive. There are three screws hidden above the CD ROM front edge. Then there are three screws you must remove from the bottom, two are standoffs and one is above the hard drive. I circled their locations in the picture below.
There is another screw that can only be reached from above, once the CD ROM is removed. There is a hole now available that goes down through where the CD drive had been to access a hidden screw down below. You have to remove the screen and all the usual screws to finally get the top cover off the laptop. Once you remove the main board the cooling fan screws are hidden under some black sticky plastic. They are extra small and hard to remove.
Hurricane Sandy
As Hurricane Sandy approaches our coast I am compelled to think back over the last few years. Somewhere on this blog I talked about how when Florida was promoting the gay lifestyle for two years in a row three hurricanes per year crossed through Florida, some hurricanes crossed more than once! Then there was California voting in gay marriage and in one night 800 dry lightning strikes started almost 1000 forest fires. Then last year New York adopted gay marriage and three hurricanes/tropical storms hit New York state in one year!
One tropical storm hitting in 20 years is more the normal for New York state. Maybe only one in every 10 years, but last year 3 tropical storms hit NY in one year! Is that supposed to be a coincidence? Now we are bracing for tropical storm "Sandy".
This storm is just the beginning of the end. I have seen visions of smoke rising out of many cities. I have heard "this will happen here" when I see the unrest in the middle east. I have had dreams where the government forces are attacking innocent civilians in the cities just like what has been going on in Syria and other countries. This upcoming election is a loose-loose situation. Either way we loose. If one side does not win they claim they will start a second civil war. If they do win they will finish off this country.
We need to pray for a miracle! We need a revival to save this country. We have committed three major sins. First there is the shedding of innocent blood - abortion. Then there is promoting homosexuality in our schools and with the changing of the definition of marriage, this is the "abomination that brings desolation". And last of all we have abandoned Israel, God's country and His people.
One tropical storm hitting in 20 years is more the normal for New York state. Maybe only one in every 10 years, but last year 3 tropical storms hit NY in one year! Is that supposed to be a coincidence? Now we are bracing for tropical storm "Sandy".
This storm is just the beginning of the end. I have seen visions of smoke rising out of many cities. I have heard "this will happen here" when I see the unrest in the middle east. I have had dreams where the government forces are attacking innocent civilians in the cities just like what has been going on in Syria and other countries. This upcoming election is a loose-loose situation. Either way we loose. If one side does not win they claim they will start a second civil war. If they do win they will finish off this country.
We need to pray for a miracle! We need a revival to save this country. We have committed three major sins. First there is the shedding of innocent blood - abortion. Then there is promoting homosexuality in our schools and with the changing of the definition of marriage, this is the "abomination that brings desolation". And last of all we have abandoned Israel, God's country and His people.
Tuesday, October 16, 2012
12 Things to look for in a new web site
Here are twelve things to look for when you are creating
or purchasing a new web site design.
These are some serious questions that you need to ask before investing
in a new web site.
1. Does it use an industry standard platform such as
Joomla or Wordpress or does it use some sort of “custom code”? If it is not based on an industry standard
platform, then how many bugs are hidden away in the “custom code” and how is
the custom code going to be kept up to date?
2. Does it rely on Java and or on flash in order to
work? If so there are a lot of people
that have those disabled or they do not work properly on their computers. An animated jiff can usually do the same
thing as flash without any of the risk.
3. Does it have a simple HTML/CSS based menu system that
can be easily followed by and indexed by the search engines? If the menu is hidden in flash it might as
well not exist.
4. Does the web site submit a site map weekly to Google
and to the other search engines? That is
the quickest way to get your web site indexed by the search engines.
5. Does it have titles on all of the pages, all of the
links and on all of the pictures? Titles
are an easy and safe way to stuff keywords that are highly ranked by the search
engines.
6. Does the home page have a clear purpose? What do you do? What makes your company better than the
competitors? If they have to search to
see why your web site exists then it might as well not exist.
7. Does the home page have a place to sign up? It needs some sort of “Call to Action”? There
has to be an easy way to sign up for web only specials, deals, monthly
newsletters, etc.
8. Does the home page have social media links? Follow us on Facebook, LinkedIn, and whatever
other social sites that your company uses?
Can they “like” your company?
9. Is there a “about us” or “Contact us” with you
physical address and phone number? I
almost always want to know where a company is physically located before I order
anything from them.
10. Does it have an easy to find search function that
returns relevant results? I hate it when
I have to use Google to search inside a web site for something that I know is
hidden in there somewhere.
11. Does it support mobile browsers? This usually requires that it detect a mobile
device and then reformats the entire site to fit on the mobile device.
12. Does it use colors that make the text unreadable? There needs to be lots of contrast between
the background and the text. For example
green text on a blue background can be unreadable.
Wednesday, October 10, 2012
New roof project
Well for months I debated between putting on a metal roof or using shingles. Metal costs a tiny bit more but is many times faster to install. Well the folks at 84 lumber had Architectural shingles on sale for $86 per 100 square feet. That compares to about $105 everywhere else.
First I had to remove the flat roof over the deck and replace the last 1 to 2 feet as they had rotted out. Then I put on a new roof using roll roofing. Basically you nail down a 9 to 10 inch wide strip around the outside edges. Then cover those strips with roof cement and then put the new roofing on using that cement, and nail down the top edge. That way no nails are visible when it is done. However it leaked the first time it rained because the cement was not dry yet in the seams.
Here is the roof when it was almost done. Note that I spilled a little roofing cement on the flat roof near the ladder.
Here is the new roof once it was done on the first side. I also replaced the attic vents because 84 lumber had them for less than $10 each and the old ones were very rusty. The vent pipe in the middle was spray painted after this picture was taken.
Next the car port roof needs replacing, it has always leaked.
Here are some "Before" pictures, first one of the main roof then one of the carport roof.
First I had to remove the flat roof over the deck and replace the last 1 to 2 feet as they had rotted out. Then I put on a new roof using roll roofing. Basically you nail down a 9 to 10 inch wide strip around the outside edges. Then cover those strips with roof cement and then put the new roofing on using that cement, and nail down the top edge. That way no nails are visible when it is done. However it leaked the first time it rained because the cement was not dry yet in the seams.
Here is the roof when it was almost done. Note that I spilled a little roofing cement on the flat roof near the ladder.
Here is the new roof once it was done on the first side. I also replaced the attic vents because 84 lumber had them for less than $10 each and the old ones were very rusty. The vent pipe in the middle was spray painted after this picture was taken.
Next the car port roof needs replacing, it has always leaked.
Here are some "Before" pictures, first one of the main roof then one of the carport roof.
Sunday, September 16, 2012
47 inch Sony TV teardown
My neighbor was throwing out a huge TV because the screen was broken. I told him that you can make money selling the parts on eBay. He told me that I could do that, so I hauled it away. The number of inverters inside of it really surprised me. There are a total of 24 inverters in there. Here is a picture of what the guts looked like.
By the way the circuit boards sold for about $50 and the base sold for an additional $30!
Tuesday, September 4, 2012
My latest book is on Kindle
My book "Creation is a Fact" is on Kindle! You can find it at http://www.amazon.com/dp/B00937S4IQ
It has taken a lot of work and as I can see there is still a lot more work to to do. The table of contents needs work, several things need fixing for the smaller page width, and there is another book to add to the bibliography called "Cryptozoology from A to Z"
Even as I was publishing the book the news came out that drilling at the Antarctic found proof that it was once a tropical paradise just like the North pole! Remember that the south pole is much colder that the north pole. How could it have once been part of a tropical paradise? Only via the canopy theory as found in my book.
Why write another book on creation? Because I want to answer the question of what God did on the eighth day. God created everything in six days, then he rested. Then what did He do? Many creationists seem to imply that He never woke up form his "nap". I believe that God went back to creating. I believe creation is part of God's nature. That explains why stars and planets are still being created today. God loves to create. He loves to be creative in our lives as well!
I have also created an Amazon author page, it is at: www.amazon.com/author/bobdavis321
It has taken a lot of work and as I can see there is still a lot more work to to do. The table of contents needs work, several things need fixing for the smaller page width, and there is another book to add to the bibliography called "Cryptozoology from A to Z"
Even as I was publishing the book the news came out that drilling at the Antarctic found proof that it was once a tropical paradise just like the North pole! Remember that the south pole is much colder that the north pole. How could it have once been part of a tropical paradise? Only via the canopy theory as found in my book.
Why write another book on creation? Because I want to answer the question of what God did on the eighth day. God created everything in six days, then he rested. Then what did He do? Many creationists seem to imply that He never woke up form his "nap". I believe that God went back to creating. I believe creation is part of God's nature. That explains why stars and planets are still being created today. God loves to create. He loves to be creative in our lives as well!
I have also created an Amazon author page, it is at: www.amazon.com/author/bobdavis321
Wednesday, August 22, 2012
Removing AVG 2102
Is AVG 2012 a virus?
I had to remove AVG 2012 from a computer the other day. First I tried "AddRemove" programs from the control panel but it did not work. Then I tried CCleaner but it could not remove it. I could not even manually shut AVG 2012 down from "Windows Task Manager".
Finally I restarted the computer in "safe mode" and located C:\Program Files\AVG and AVG2012. I then deleted the entire directories. When I restarted the computer and I ran CCleaner to fix all of the registry errors. Next I installed "Microsoft Security essentials". Now the computer runs much faster and uses a lot less memory.
I had to remove AVG 2012 from a computer the other day. First I tried "AddRemove" programs from the control panel but it did not work. Then I tried CCleaner but it could not remove it. I could not even manually shut AVG 2012 down from "Windows Task Manager".
Finally I restarted the computer in "safe mode" and located C:\Program Files\AVG and AVG2012. I then deleted the entire directories. When I restarted the computer and I ran CCleaner to fix all of the registry errors. Next I installed "Microsoft Security essentials". Now the computer runs much faster and uses a lot less memory.
Wednesday, July 25, 2012
Why are there two bottles when it fits in one?
Have you noticed lately that you can but two bottles of medicine and then pour the second bottle into the first with room to spare?
I see it all the time, a big deal, two jars for the price of one. They are both less than half full! Why not sell just one FULL jar for the price of one, and save on the environment?
Friday, June 29, 2012
Quick fix for wet basement
How to quickly and cheaply fix a wet basement. Drill holes in the bottom of the cinder blocks and let the water out. Then fill the blocks with expanding foam. Each can can only do 3 or 4 blocks. As the foam expands it will push more water out of the blocks.
I got this idea from a church that was being built. First they laid the blocks for the basement. Then they brought in a big truck and filled all of the cinder blocks with foam. If the blocks are filled with foam then the water cannot get into them.
The many cans of expanding foam might be expensive, but it is far cheaper than digging up all around the foundation and re-coating the outside or digging up the floor and putting in a drainage system.
If you can get at the top of the blocks you can also fill them from the top too. Do that in several layers of foam with time to harden in between the layers otherwise the weight of the foam will compact itself. It still takes a lot of cans of foam to do this. I am sure there must be a company out there that can fill the blocks with foam from a truck!
I got this idea from a church that was being built. First they laid the blocks for the basement. Then they brought in a big truck and filled all of the cinder blocks with foam. If the blocks are filled with foam then the water cannot get into them.
The many cans of expanding foam might be expensive, but it is far cheaper than digging up all around the foundation and re-coating the outside or digging up the floor and putting in a drainage system.
If you can get at the top of the blocks you can also fill them from the top too. Do that in several layers of foam with time to harden in between the layers otherwise the weight of the foam will compact itself. It still takes a lot of cans of foam to do this. I am sure there must be a company out there that can fill the blocks with foam from a truck!
Wednesday, June 6, 2012
How to list all posts in WordPress
I recently had the need to list all posts on a WordPress web site. After hours of playing around I found a great Plugin called "Get Post List With Thumbnails". It did a great job of listing everything in the sidebar but the explanation on how to get it to show up in a page is a bit difficult to understand.
To list everything in a page, create the page, then switch to HTML and put something like this into it - [gplt orient="h" imgo="false" ttgo="true" dtgo="false" dtfrm="1" categ="" postnr="200" linn="4" divwid="300" tbwid="100" tbhig="100" cp="1" cs="1" lwt="2" tte="" sptb="false" tgtb="false" ordm="DESC" ordf="ID" metk="" mett="" pgin="" ptype="post" dexcp="false" gptb="false"]
That short code above will do 4 across by 50 top to bottom for a total of 200 posts. It looks like this:
The short code is a bit difficult to figure out. To get an idea of what the codes mean use the widget in a sidebar and the long version of the short codes will then show up.
To list everything in a page, create the page, then switch to HTML and put something like this into it - [gplt orient="h" imgo="false" ttgo="true" dtgo="false" dtfrm="1" categ="" postnr="200" linn="4" divwid="300" tbwid="100" tbhig="100" cp="1" cs="1" lwt="2" tte="" sptb="false" tgtb="false" ordm="DESC" ordf="ID" metk="" mett="" pgin="" ptype="post" dexcp="false" gptb="false"]
That short code above will do 4 across by 50 top to bottom for a total of 200 posts. It looks like this:
The short code is a bit difficult to figure out. To get an idea of what the codes mean use the widget in a sidebar and the long version of the short codes will then show up.
Tuesday, May 22, 2012
How to locate infected computer with a UTM5 or UTM10
I have worked with a number of Firewalls over the years, but the Netgear UTM Series Firewalls are not easy to work with. After several attempts to find what computer is trying to access an infected web site I made a printout so I could easily find my way there.
Select "Content Filter" set the date back one day and select "Download" to get a copy of the data. It opens with a spreadsheet and then you can look in there to see who the offending computer is.
Wednesday, May 9, 2012
Comparing Digital TV Antennas
I have tried two different antennas for Digital TV reception. One cost me only $2 at a yard sale. One was far superior in rejecting interference and in reducing the number of drop outs.
Would you believe that the older antenna in the bottom picture did a much better job of rejecting interference like that of a train going by and in reducing dropouts? The four "bow tie" design is by far the best antenna for modern digital TV reception. The other antenna designs like the one in the top picture feature VHF reception and that is only needed for FM radio these days. The older bow tie type of antennas are also not nearly as directional so you usually do not even need an antenna rotor to get a good picture. So save yourself some money and get one of the old antennas!
Subscribe to:
Posts (Atom)