Showing posts with label Home Repairs. Show all posts

Tuesday, September 23, 2025

I am building a new deck.

 I am building a new deck with 2x6" and Trex flooring.  The handrails are Veranda available at Home Depot. This picture is the framing using 10 and 12 foot 2x6's. In the foreground is what remains of the old deck.

Then I covered the flooring with 12' Trex boards.  They are actually 12 foot 1/2 inch to 12 foot 1 inch in length.  I only had to cut one as they are slightly longer than the 12' 2x6's.

Next was adding some handrails

I made some temporary steps.

Then finally adding some stairs and some handrails for them.

There is still some trimming to do such as skirting but for the most part it is working.


Thursday, September 4, 2025

Mini-Split Line Cover Problems

I have now installed three mini-split heat pumps.  I would only recommend the MrCool ones as the flared line sets seem to always leak. One of the issues is in covering the line sets.  Some people use the plastic eves, and I have done that as well on an existing HVAC installation. This one installation took two of the line cover kits at $39 each, and then I was still short one straight coupler.  So I designed my own couplers and 3D printed them.


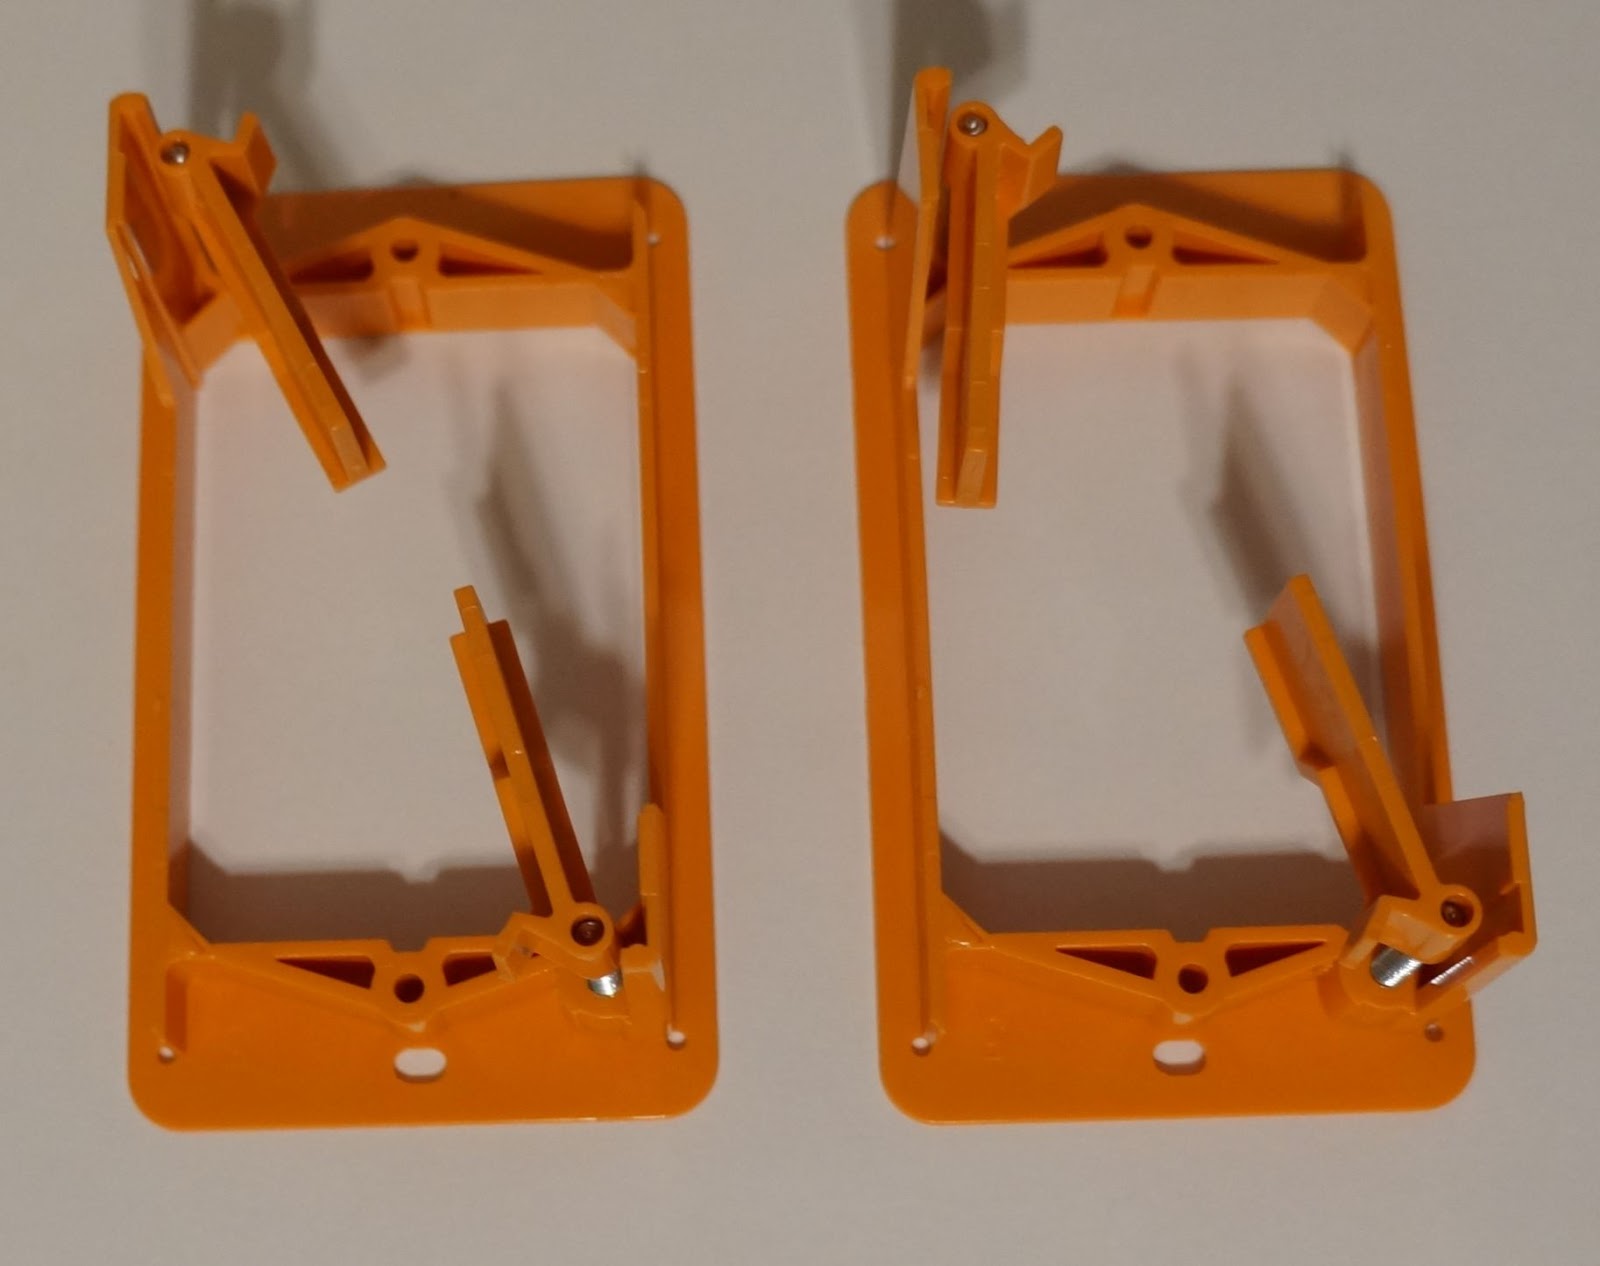
Here is a picture of the first two couplers that I designed.  Later I came up with a design with hidden screws. I did not have white filament so I had to spray paint them to white.  My designs are on thingiverse.


Monday, March 31, 2025

We had to dig up the church well

The pump quit in the church well so we had to dig it up.  When we tried to pull it we could see somthing on the pitless adapter.  We tapped it with a long stick and discovered it was a rock and now it was further down in the well.  No amount of pounding or pulling would loosen the pitless connector.  So we had to did up the well.


After digging up the pitless and removing it, the pump came up easily.  We did not see any rocks!?!  We did see the real problem: the wires to the pump were burnt and one wire was disconnected.


We could also see the pitless was bigger than normal and after hitting it many times with different hammers it finally came apart.  there was no O ring!  It had likely leaked and the leaked water formed a rust/calcium bond glueing it in place.


Tuesday, January 16, 2024

EcoQuest Fresh Air II air purifier repair 2

I found myself once again doing some EcoQuest Fresh Air II air purifier repairs.  One of ours quit making ozone.  I opened it up but could not find the problem.  After looking at it several times and getting ready to salvage parts and toss it, I then discovered that R11 was toast.  Checking the FET, a 10N20L showed that it was shorted!

I disconnected the 10N20L by clipping the leads and it was still shorted.  R11 was toast and there was no way to find out its value.  Unfortunatly I threw out my spare board! Oops.


I could not find a 10N20 but did find a IRF630 that has similar specs and used that.  The drain is connected by the case but the replacement will not solder to the board so you will need to run a small jumper wire.  A 4.7 ohm one watt resistor will work for R11 as it was a current limiter resistor (I think).


  So it has been up and running for a couple of hours now with no problems.  

Saturday, March 4, 2023

Replacing a 30 gallon hot water heater with a 40 gallon one

About 10 years ago I replacde my hot water heater.  There is a old blog post on it.  For some reason the bottom element quit working so I thought i would fix it.  It turned out that there had been a water leak for a long time.  The area was completely rusted out so I did not dare touch it.  My wife wanted a 40 gallon heater but they are 21" in diameter and would not fit in the space available.  However I discovered that there is a narrow 18" diameter 40 gallon water heater that is available at Lowes.

The 12 year old water heater.  It had rust stripes below the lower element access cover.


The new narrow 40 gallon water heater.  The opening was not big enough for me to get my head in there to see the wiring so I did the wiring kind of blind.  The wire was just barely long enough.  I replaced one pipe and extended the other pipe.


Retrofitting Par 56 Light fixtures with LED lights

Someone donated some PAR56 Light fixtures.  They came equiped with 500 watt light bulbs.  That means that you can only have three of them on a typical 120 volt circuit.  So I thought I would retrofit them with some LED lights.  But a direct replacement LED light is $100 each!  Then I came up with a retrofit that can fit almost any light from a PAR38 sized bulb.  Now they are not as bright, typically 1000 to 2000 lumens.  The 500 watt lights are around 6000 lumens!  But the LED lights are still very bright, even blinding to look at.

All you need for the retrofit is a metal strap, it needs to be strong, I have doubled up some of the wimpy straps to get enough strength. Then you need a 1000 watt ceramic socket.  I bought several of them on ebay.


Here is an ad for the ceramic light sockets.  You have to reroute the wires so the mounting hole can be used.  A 10-32 screw and nut works well to mount the socket to the strap. 

Here is an ad for some 1650 lumen, 19.5 watt LED light bulbs.  Make sure they are dimmable and daylight 5000 kelvin lights.

Thursday, February 9, 2023

Fix for cheap refrigerator plastic parts

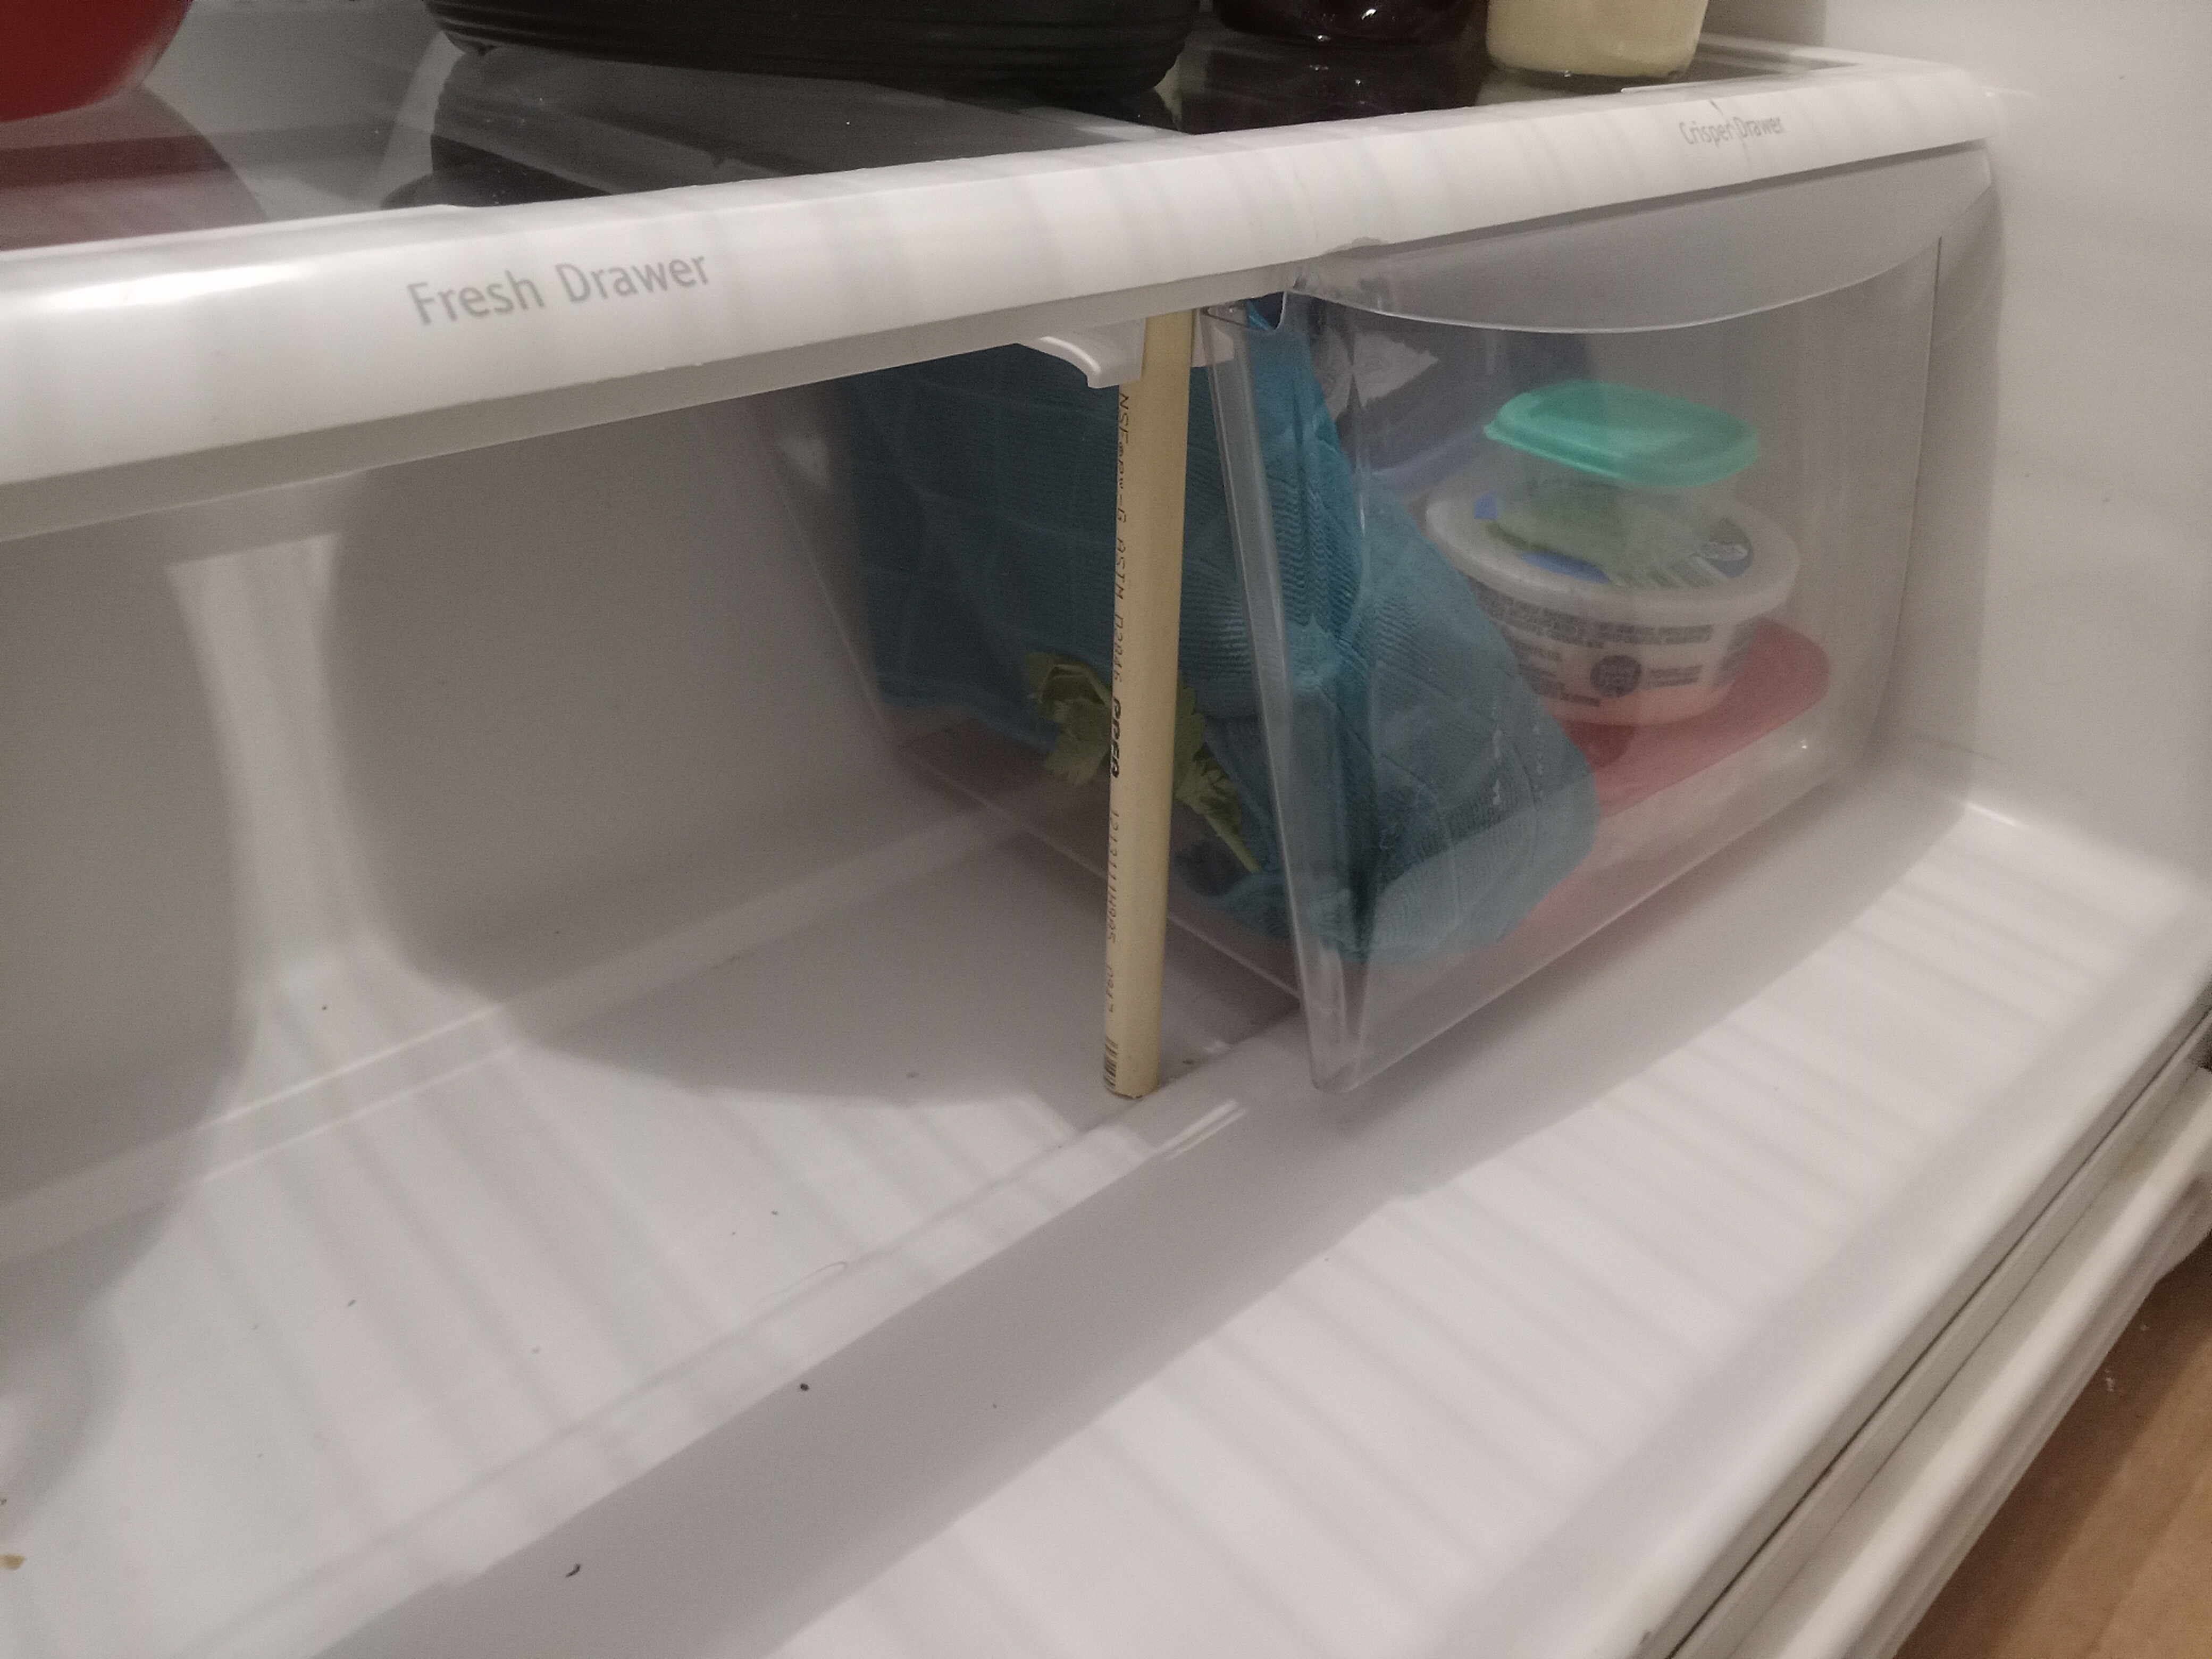
These days there are some really cheap refrigerator plastic parts.  The things in the doors break and fall out.  The bottom shelf plastic falls apart.  I looked for replacements and they run close to $100!  So I developed my own fixes for them.  To start with the door shelf holders can be fixed with a pencil and lots of glue!  The pencil is covered in E6000 or similar glue and inserted under the lip.


This is a close up of the pencil that reinforces the shelf front.

The bottom plastic surrounds a piece of glass.  The plastic breaks away and leaves the glass loose.  A nine inch long piece of 1/2 inch plastic water pipe works perfectly.  No glue is needed, but you can add some if you want.

Don't forget to fix the handle.  That breaks off rather quickly.  I used a metal strap, some screws and lots of glue.


Monday, September 10, 2018

Home Repairs/Upgrades

 I recently replaced the lattice in my carport with the heavy plastic.  The panels are called "26 in. x 8 ft. Polycarbonate Roofing Panel in Clear" I did it because one of my neighbors threw out the panels.  Then I replaced the slats that were on my deck with the lattice.

This picture is what the carport looked like half done.

This is what the carport looked like when it was almost done.

This is the old deck rail slats being removed. I had already started replacing the slats with lattice when I took the picture.

This is the new deck rail with lattice installed and painted.

Sunday, October 15, 2017

What my Lab/Office looks like

I thought I would update what my office looks like.  Maybe I am bored or lacking in posts this year so I thought I would post something.  My F-550 is hanging from the ceiling with only its legs visible.  I am now using a rolling desk for my 3D printer 24 inch monitor and tools.  There is another book shelf to the right but it has not changed any.  My CNC found itself hidden in the closet....
I have a "New to me" notebook computer.  Its a EliteBook 8560W.  It was $5 at a Hamfest because of a bad screen.  The necessary repairs are elsewhere on my blog.

Monday, July 31, 2017

My New To Me Huskee LT-3800 Mower

I picked up a three year old Huskee LT-3800 Mower for $220.  The seller thought it was dead but I was able to start it, so I bought it.
The first thing I had to to fix was the cable for engaging the blades.  It is a 55" cable found on eBay for about $12.  The replacement cable works great.
The next problem was that it would quit after one lap around the yard and would not restart for several minutes.  There was a clog in the intake to the carburetor.  I completely rebuilt the carburetor but all that needed to be done was to remove the clog with a jewelers screwdriver and then clean it up with a pipe cleaner.  The red arrow shows where the problem was.

Monday, November 14, 2016

How to hide wires going to a wall mounted TV

My wife has wanted me to hide the wires going to the TV for some time now. This is what I started with, a TV with lots of wires going to it.

This is my secret weapon, electrical pass through boxes.  These and a hand held hole saw did the trick.

I ran into problems right from the start, electrical wires that were in the way.  They had to be moved to the right slightly.  They also made cutting the hole a bit tricky.

Then there was a second problem, there is a 2x4 going cross wise in the wall.  I cut it off on the right side and then cut off the nails.

Last was to hide the cable and internet cables behind the baseboard.  I cut a grove in the sheet rock and a grove in the baseboard.

Time to patch up the hole where I had cut through the cross wise 2x4.  A piece of thin plywood like luan works for the backing.

This is the almost finished product.  Now to repaint the wall....

Wednesday, August 17, 2016

What my Lab / Man Cave looks like

I recently added some more shelves in my lab to hold more books, videos and projects.  Here is a couple of views of the room.

On the left side at the top there is my DVD video collection, below that there are my Volt/Ohm meters, cameras, etc. Lower down is my prototypes for my books in white plastic binders.  Center is my project shelves with some dinosaurs and my CNC machine covered in stuff.  At the bottom there is a cupboard that my dad built for me when I was a teenager.

In this picture is my free-to-me 32 inch TV mounted on the wall.  Below that there is my free-to-me 17 inch laptop and a road kill 24 inch monitor (attached to the Raspberry Pi on the desk at this time).  To the right of that is my Epson printer that was also given to me.  The book shelf on the right side of the picture actually holds books as well as some parts bins and my CD / Software collection.  The cute brown dog is something I made way back when I was in high school.

So there you have it, the room where all of my books have been written, the room where my inventions are being built.

Wednesday, June 29, 2016

MY latest home improvement - removed wall for an "Open Concept"

I have removed the wall between the dining room and kitchen.  This creates an open concept, making the living room and kitchen seem bigger.
Being a mobile home there was already two 8 inch by 2 inch laminated beams down the center.  There was a one inch gap in the center between the beams that was filled with plywood to bring the beam size to 8 inches by 5 inches.  The existing wall was not a supporting wall as it was only under one of the beams and was made out of two pieces, having a top and bottom half.  The beam was then covered with 1 by 8's to make it look better.

To fix the floor was a little bit tricky as the flooring material was no longer available.  I found some similar laminated flooring that almost matched the old flooring and then used that.  I used a real oak bridge to fill the gap between the laminate of the living room and the kitchen flooring.

Wednesday, April 30, 2014

DIY Raised Gardens in NY with very little land

Last year I started a small raised garden.  I started the plants indoors in March and then moved them outdoors into two raised beds made out of 2 by 6's.  Each one was about 8 feet by 3 feet in size.

Last year I used egg cartons to start the plants, they were way too small!  This year I used mostly yogurt containers to start my plants.  The plants seem to thrive in these yogurt containers.  I poked a hole in the bottom of them to help prevent over-watering.  I also bought some plant starter kits.  They were a total flop, only about 8 out of 36 plants grew!  All of the seeds in the yogurt containers grew.  The problem with the starter trays is that the "dirt" must be pointed up before the water is added. Otherwise the dirt expands crosswise and is under too much pressure for the plants to grow.  Also the potting soil that was used in the yogurt containers is far more effective in starting plants.

Here is a picture of them after about a month.  The cardboard type of seed starters are better than the yogurt containers in the long run.  They are ready to go in the ground, half of them are already planted.

Here is what my garden looked like last year when everything was first planted outside.  The peas are in the front row.

This is an update - the garden in June.

This is what the garden looked like at the end of last summer.  The peas have died and cucumber and zucchini have taken over.
Another secret to gardening is to use rain water.  I have a large plastic trash can that fills with rain water to keep the garden watered.  If you must use tap water then let it sit overnight first.

Tuesday, October 29, 2013

Replacing the stove vent hood

Replacing the stove vent hood should be an easy thing to do.  However I wanted it to vent inside in the winter and then vent outside in the summer.  I also had to adapt from the new exhaust size of 7 inches to the old pipe size of 5 inches.  I used a 7 inch to 6 inch adapter, then a 6 inch to 5 inch adapter.  Then to shut off the external vent during the winter I added a 6 inch flapper.  I had to cut off the old 5 inch pipe to make room for the new adapters.  Then I had to cut 1 inch slots in the old 5 inch pipe to get the new adapter to fit inside of it.

I also had to cut bigger holes in the cupboard to fit the new 7 inch diameter pipe adapter.  Then I had to cut it two more times to make room for everything to fit together.

Then I had to assemble the adapters with the closer/flapper and test it all out prior to installation.

This is what it looked like once assembled in the cupboard.  The hole in the top of the cupboard is now closed off with duct tape.  Cutting a piece of thin plywood to fit using a cardboard model would have looked better.

I forgot a picture of what it all looks like once assembled, hopefully I will include that soon.

Thursday, November 8, 2012

New floor for a friend

Recently I installed a new floor for a friend.  It is the interlocking wood floor like what I did in my living room.  These came with a water seal and pad built in so installation was easier.  Here are some pictures of the resulting floor.