Tuesday, December 31, 2019

90 x 16 Addressable LED sign with Arduino Uno and Bluetooth

I have added the ability to select the background color to my LED sign software.  The format is 080100 TEXT.  The numbers are for RGB foreground colors and RGB background colors.  Our cat Momo photobombed one of my video shoots.


Here is the video:


This is a picture of the controller.  The Bluetooth module is plugged directly into D0 and D1 at the top.  The network jack has eight 330 ohm resistors in series.  Power comes in on the Vin and ground pins.
The strips come in rolls of five meters or 16.4 feet and need to be cut into 4 or 5 foot lengths depending on the size of the sign.
Here I am adding the strips to a sign board background.

This is the back side of the sign. Power comes into all 16 LED strips but the lower eight have their data from the other side of the top eight strips.  There are two power connectors for five volts at 15 amps each.  You can connect them together to a 5 volt 30 amp power supply.

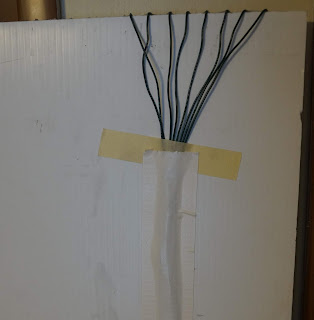
 This is the eight data wrap around lines from the top eight strips going to the lower eight strips.

This next picture is of some LED strip lights decorating some windows.  I used automotive trim tape to hold the strips in place

Here are two pictures of one of my signs in a store window.

Here is another Video showing some new features.


Monday, December 23, 2019

Panasonic AG-HVX200 Recorder with DigitNow! P2 Card Alternative

I purchased a DigitNow! Video Capture Device to use as a P2 card alternative.  It works at 720P with a Panasonic AG-HVX200 Camera. You have to select the input every time you turn it on.  It has built in RCA jacks that makes connection it to the camera easier and more reliable.  It also has a wired remote "Record" Button.  It costs about the same as a Panasonic P2 card but can work with any USB memory stick.

Here is the video recorded on the DigitNow! recorder.


Here are front and back views of the DigitNow! video recorder.


Saturday, December 14, 2019

Quick and Easy Retrofit Fluorescent Street Sign With LED's

I recently retrofitted a street sign with a 10 meter (about 33 feet) string of 24 volt LED's and a 24 volt three amp AC adapter.  I was thinking of taping the LED's to the sides of the bulbs, but then I realized that if I wrap the leds around the bulbs they would be held in place much better.  This sign needed three 5 foot (Very hard to find)  light bulbs and likely a new ballast.  The LED conversion took all of 10 minutes to do.  Total power consumption is now about 50 Watts.

This picture was taken at 9 AM in the morning, it looks like it was dark out because of the camera compensating for the brightness of the LED's.

This is the label that was on the LED strip.  It could be bought with waterproofing already done but you can also spray on a clear coat of waterproofing.

The LED strips cost about $20 and the 24 Volt AC adapter was laying around.  Here is an advertisement for a 10 Meter strip of LED's like the ones I used.


Monday, November 25, 2019

Pyle PDWM4400 Rack Mountable 4 Mic Wireless Headset System Repair


I recently acquired a Pyle PDWM4400 Rack mount 4 headset wireless microphone system.  Some of the transmitters had broken jacks.  If you forget to unscrew the connector and try to disconnect the microphone you will break the jack.  Replacement jacks are available on eBay and the repair is quite easy to do.

This is the ad on eBay.

These pictures show the new jacks installed.  Notice that the one connection needs some more solder.


Make sure that you get jacks with threads on them for the microphone connector.

To dissemble remove the belt clip and then remove 2 screws.


Thursday, October 3, 2019

Panasonic AG-HVX200 Recorder with AGPTEK VG0020 P2 card alternative

I found a better way to record video from a Panasonic AG-HVX200 video camera.  For the price of one Panasonic P2 memory card you can buy an interface that records in 720P to a memory stick or to an external hard drive.  It is the AGPTEK VG0020.  The adapter also has a HDMI output that you can connect to a bigger monitor.

I first tried the VG0020 at 1080i video from the camera.  It would not work with one monitor and with another monitor it had a noise bar wandering through the picture.  When I switched the camera to 720p the picture cleared up and it works with all the monitors that I have tried.

Here is a picture of the AGPTEK VG0200 setup.
The Video comes out of the component output via an adapter cable.  Audio is from the RCA audio in/out jacks.

Here is the video.  The audio level is a little low..

Tuesday, September 17, 2019

Panasonic AG-HVX200 to HDMI setup.


I have finally managed to connect a HVX200 camera to an HDMI monitor.  The secret is to use a YPBPR to HDMI converter.  You will also need a special connector to three RCA plug cable assembly.  The converter does not work with all monitors, so far 2 out of 3 monitors work with it.


Here is the eBay ad for the needed cable, make sure you get a male D Terminal connector.

This is a close-up of the cable from the ad.

This is where the connector connects to the camera.  You can go into the video in/out settings and select 1080i for the highest possible resolution.

Next up is to test a HDMI to USB converter/video capture adapter.

Monday, September 16, 2019

2019 Lancaster NY Hamfest

The 2019 Lancaster NY Hamfest is over.  This first picture is my stuff.  I only made about $30 in sales.  I still have a lot of stuff to get rid of!

These pictures are of some neat stuff for sale at the Hamfest.


 How about a Raspberry to laptop converter?


This looks like a duplexer, perhaps 800 MHz?


How about a coaxial tuner?


Friday, September 13, 2019

T1000S LED Controller with 72x8 WS2812 LED's

I recently purchased a T1000S LED controller thinking it would simplify running lots of addressable LED's.  I tried to figure out the software, resetting my computer date to get it to run but it just did not seem to be easy to do. Then I tried to find a image for the SD card with no results.  So I though I would just power it up and see what happens. WOW!  The seller had preloaded a demo on the SD card that was quite impressive!

At first I tested it with a common 32x8 LED array,

The connection was easy.  Red and black go to the power supply.  Then the LED arrays inputs go to the T1000S, red and white are power and ground, then green is connected to data.

Next up was my 72 by 16 array.  However the 15 amp power supply could only run 1/2 of the display.  Even then it was down to 4.77 volts!  I ran power to both ends of the array or else the lower 1/2 gets really dim.

This is the back side of the 72x8 WS2812 LED array.
 Here is a video of it running.


This is what the guts of the T1000S looks like.


To be honest with you the T1000S software, LED Edit, is a pain and I cannot get it to work after several hours of trying!