
Here is what the insides of the CNC Pendant look like. The 555 is on the left side and the 9 volt battery is only safe to use if all of your CNC inputs have opti-couplers. The cable is a 4 pair network cable.

This is the schematic diagram of the wiring of the direction switches. You need either 6 Volts or you can use 9 volts and a 5 volt regulator.

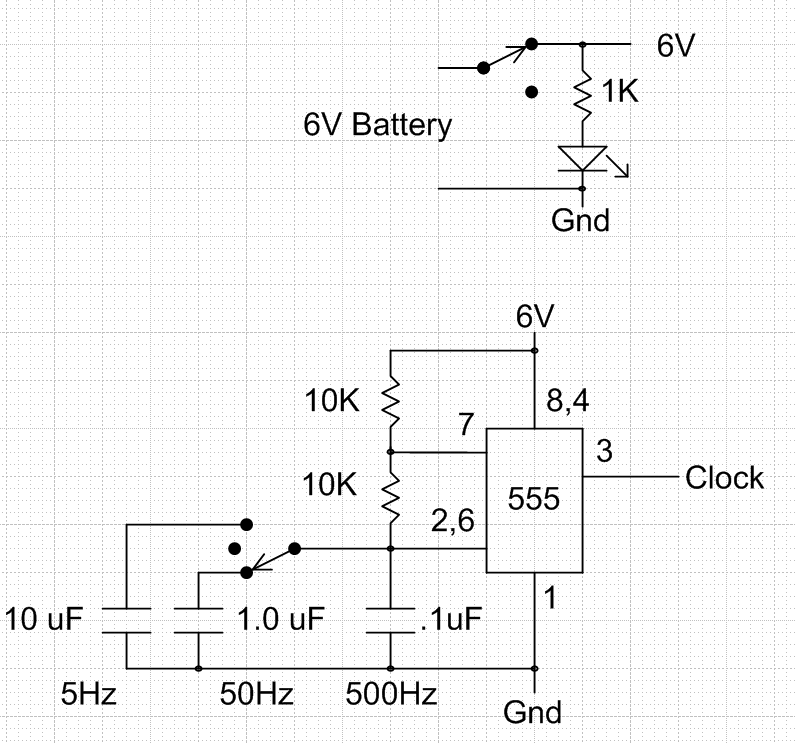
This is the wiring of the 555 timer and the power switch. Either use 6 volts or add a 5 volt regulator to protect your BOB (Break out Board) from the excessive voltages. I was using an old battery that was only putting out about 6 volts. You might also be able to tap into 5 volts from your CNC.
Here is what the DIY CNC looks like today.

3 comments:
Excellent project! Just what I need for my build. I'm probably going to make a smd board for this, do you want the eagle files?
Also, spelling error in the title ; Homemade.
Excellent project. Just what I need for my build. I'm probably going to make a smd board for this, do you want the eagle files?
Also, spelling error in the title ; Homemade
Sure, I have been hoping to make circuit boards on the CNC machine itself.
Post a Comment